Do you also want to collect contact information from your audience through a contact form in WordPress?
Creating a contact form in WordPress is a crucial step for a website looking to engage with its audience effectively. These forms in general help collect inquiries, feedback, and other important information efficiently.
Using a contact form in quizzes or surveys can significantly boost your marketing strategies by gathering email addresses and leads so that you can expand your mailing lists.
By choosing the right plugin and integrating it into your WordPress website, you can ensure a smooth and effective communication channel that improves user interaction and satisfaction.
In this guide, we’ll show you how to create a WordPress contact form and add contact forms to your quizzes.
Table of Contents
Why Create a Contact Form in WordPress?
Creating a contact form in WordPress is essential for several reasons.
- Makes Communication Easy – One of the drawbacks of any website can be that, they don’t have user-friendly and accessible contact information available for visitors to contact you. Using a contact form can easily allow visitors to reach out with inquiries or feedback, ensuring no message gets lost.
- Boosts Marketing Efforts: Adding contact forms into quizzes and surveys is a strategic way to collect user data and expands your contact database for targeted marketing efforts.
If you have an email address of your users that they have shared with you willingly and through quizzes, you have the understanding of a user then strategizing through proper resources becomes easier. - Easily Monitor Your Leads – If you want a way to collect and track leads add a contact form to your quiz or on your website. You can easily collect, organize, and review lead information, providing you with clear insights into potential customers and their interests.
By keeping all lead data in one place, you can follow up with your potential leads, boost your lead generation, and improve your sales strategy.
How to Create a Contact Form in WordPress?
Adding a contact form to your quiz/survey or just simply embedding a contact form in your website is quite simple without the need for coding with the help of the right WordPress quiz plugin.
Several plugins can help you create a contact form in WordPress, and the Quiz and Survey Master plugin proves just how easy the process can be through the setup process below.
1. Setup the quiz/form
The first thing you’ll need to do is install and activate the QSM plugin in your WordPress. For more details, see this step-by-step guide on – how to install the plugin in WordPress.
To create a contact form, you’ll have to first create a quiz, a survey, or a basic form. For that, hover over the QSM option and click on the Quizzes/Surveys tab, then click on the Add New button to create a quiz.
If you want to know in detail the process to create a WordPress quiz, see this article on – How to Easily Create a WordPress Quiz.
After going through the process of choosing a theme, and configuring quiz settings, it’s time to create the quiz/form.
You can either create a full quiz that you want your audience to take and enjoy and with it, you can include the contact form as an opt-in form for leads.
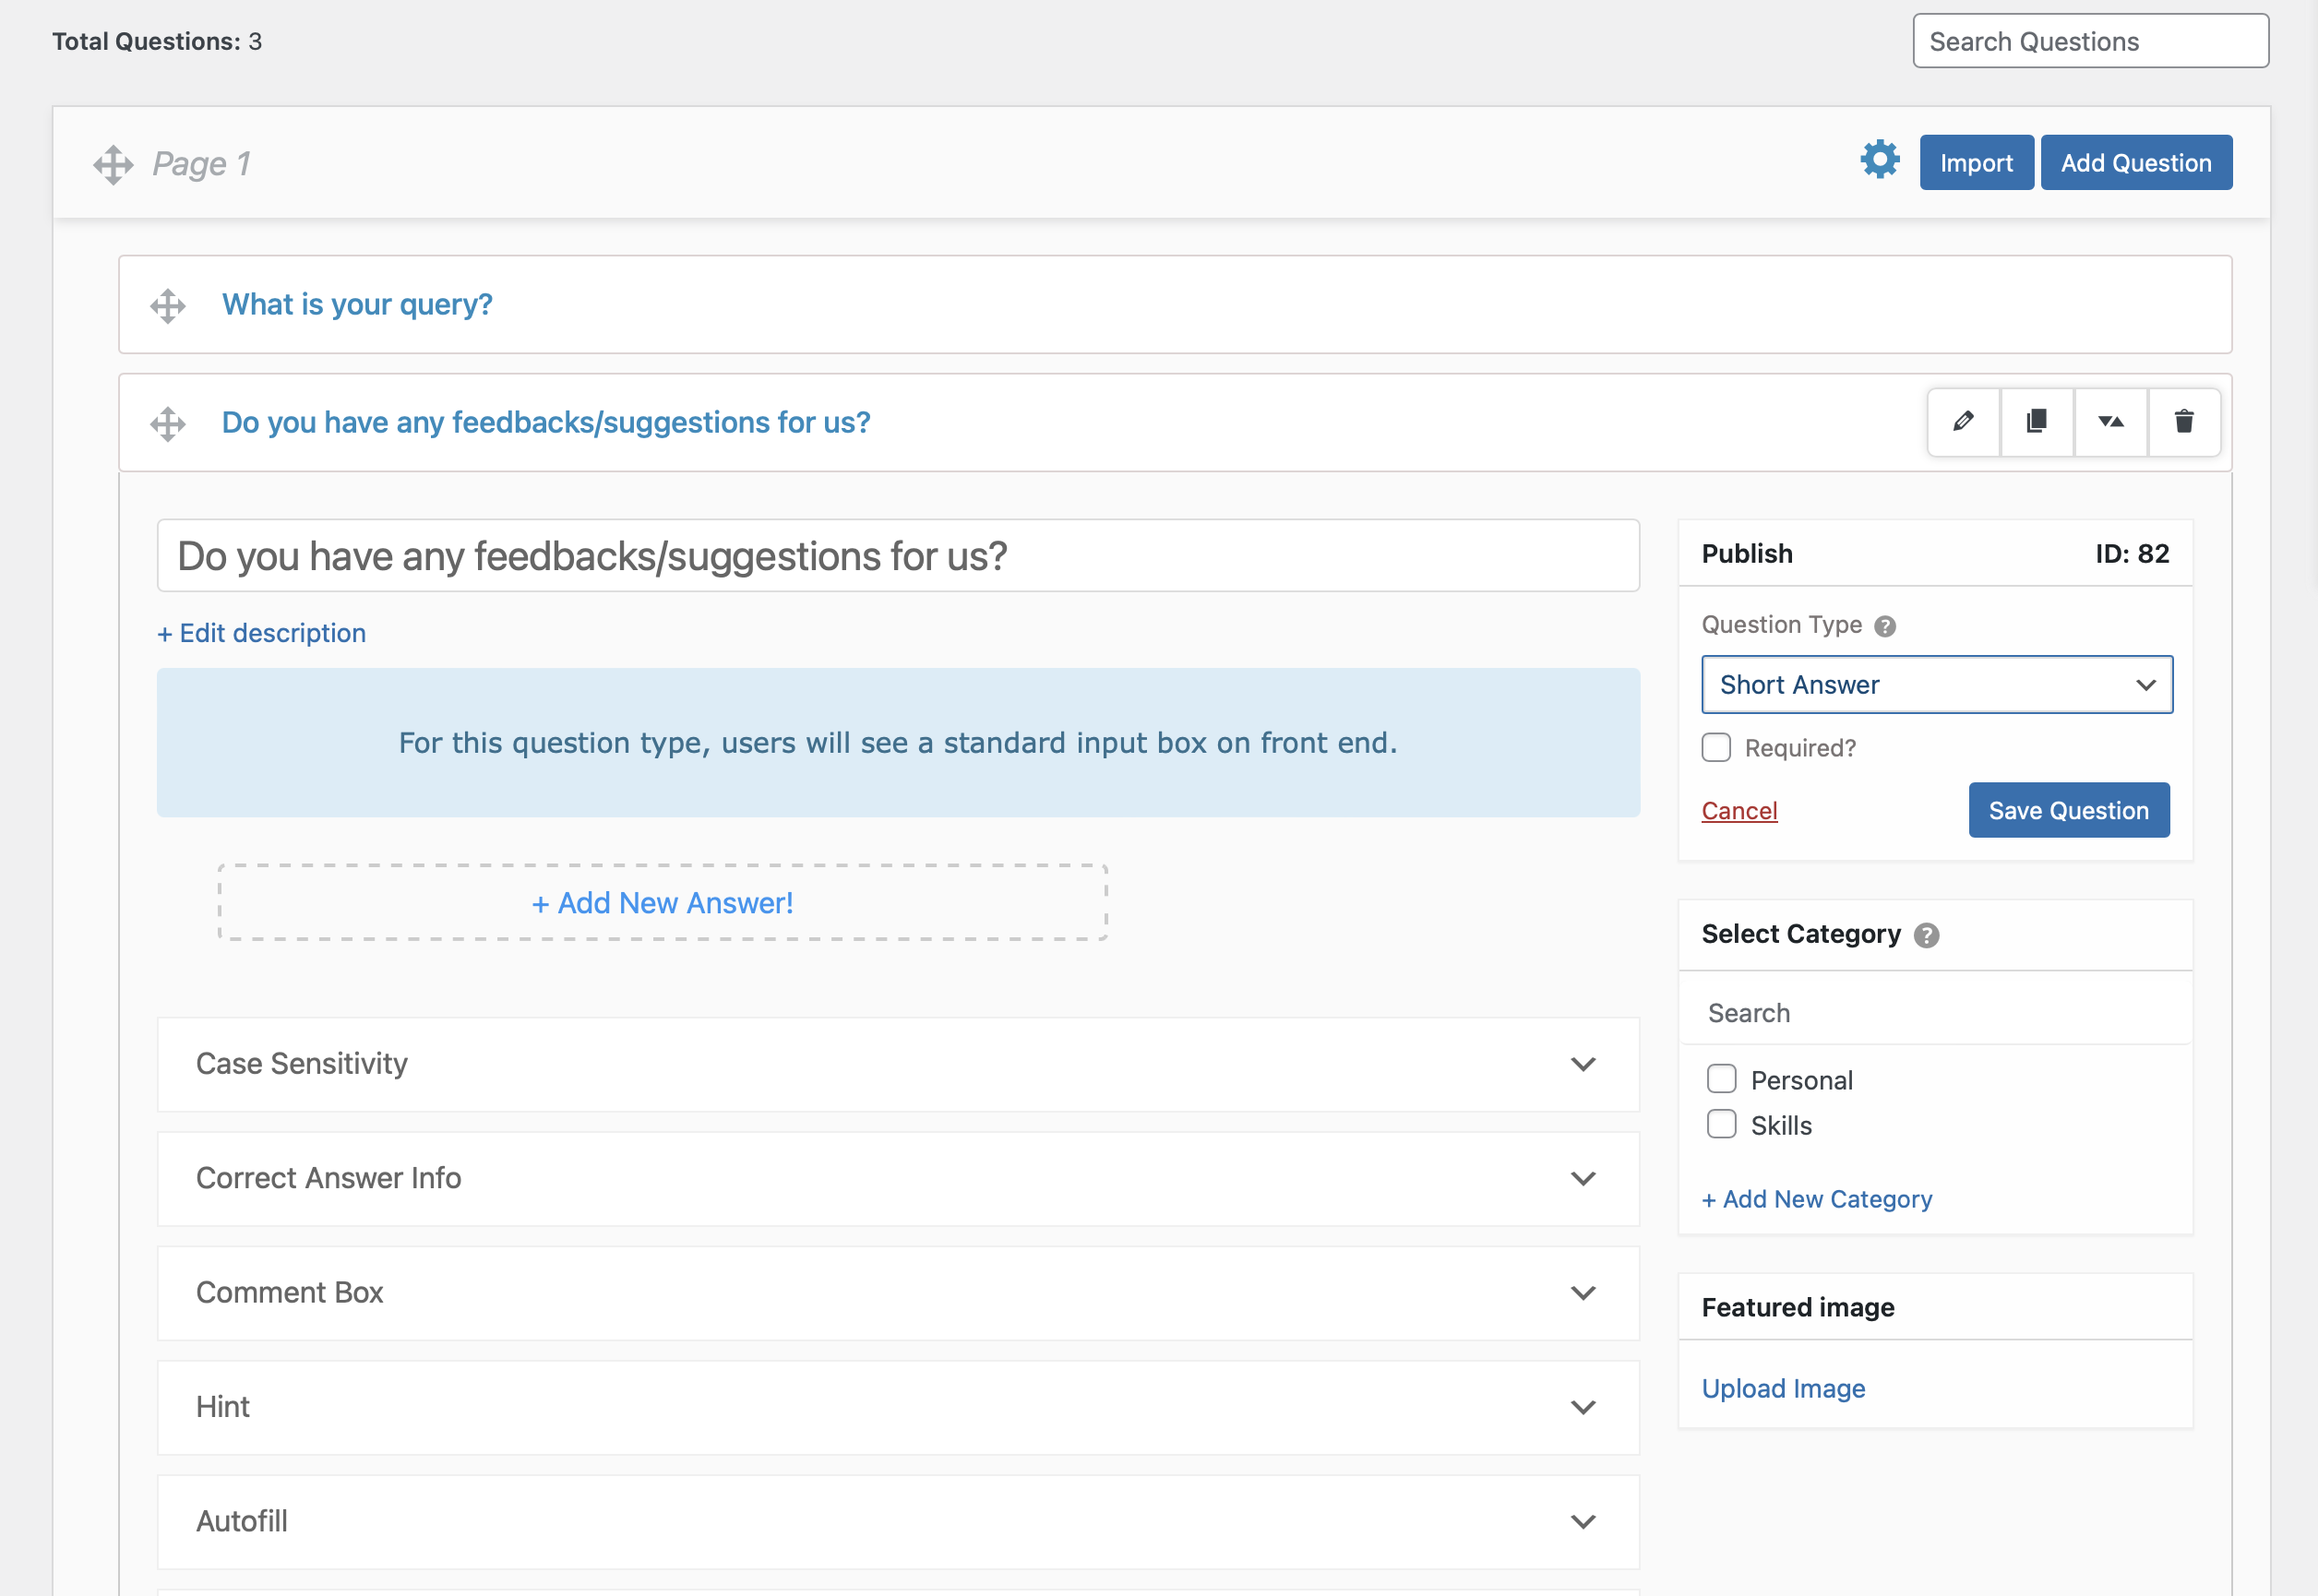
Or else, you can add a few questions that are generally included in a contact form aside from the basic contact details like – “What is the query?” or “Do you have any feedback/suggestions for us”?
You’ll get various question types to choose from, you go for multiple choice questions, short/long paragraph style, or can even use a captcha.

If you want to create a multistep contact form that will guide users to the corresponding form page, pre-designed for the query they selected, you can add questions to new pages. And use the skip logic function using the Logic Add-on in the QSM to guide users based on their responses.
Step 2: Add the Contact Form
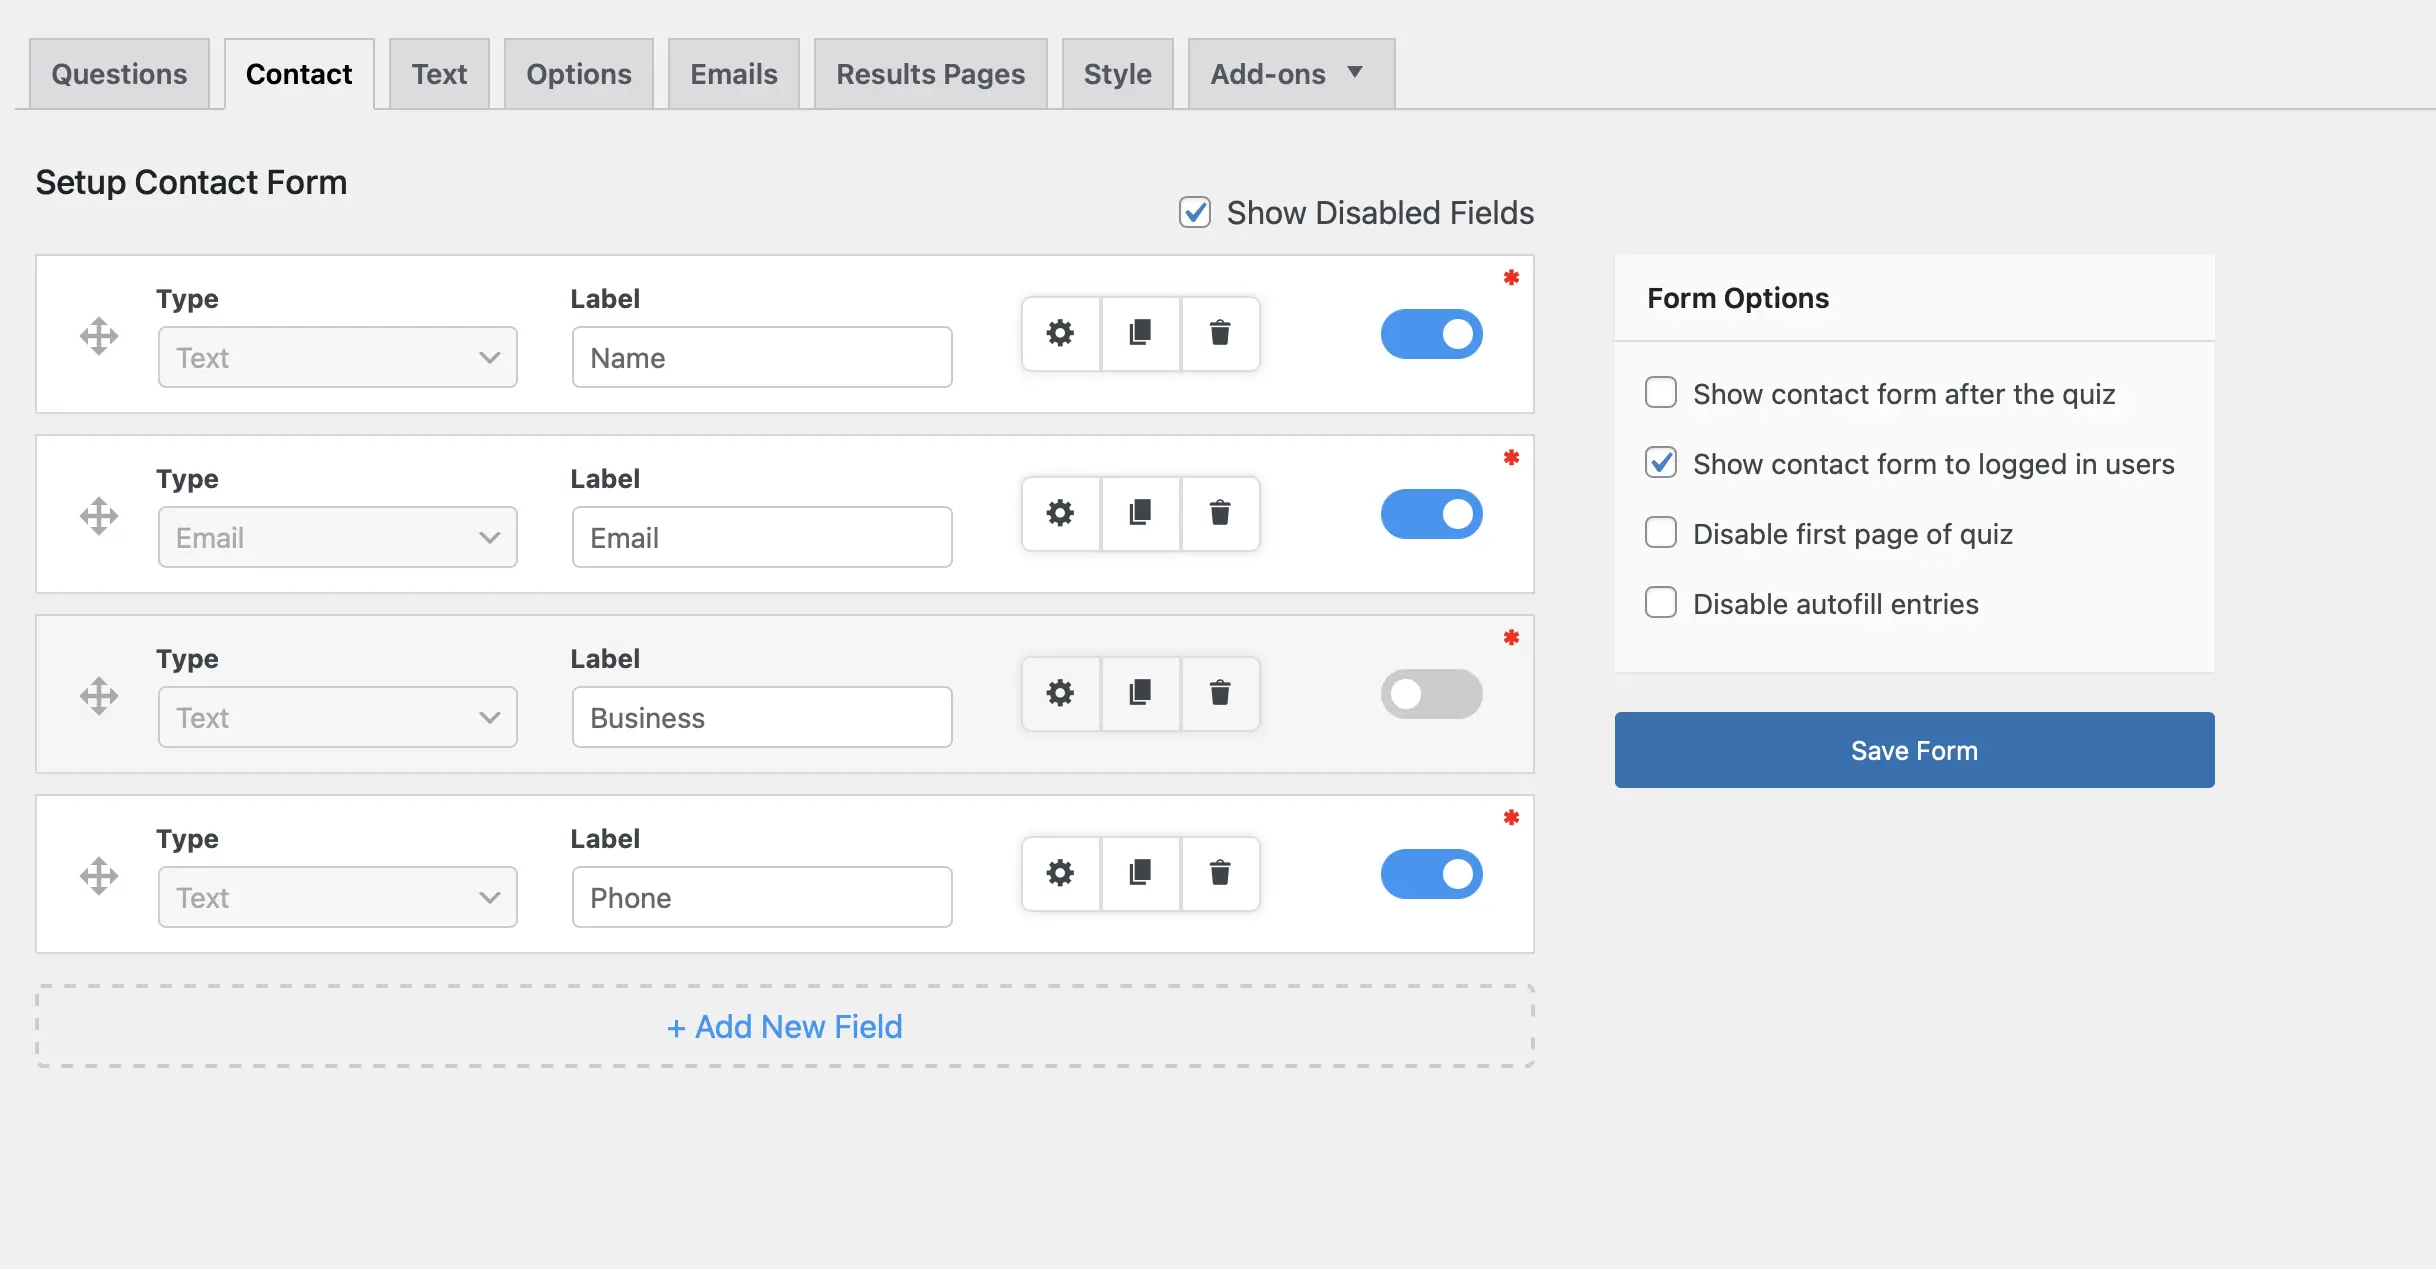
After you have created the basic form or a quiz/survey, your next step will be to the Contact tab. Here, you will see a few pre-added fields [if you can’t see them, then just click on the “Show Disabled Fields” checkbox].
All you have to do in these pre-added fields is first enable the toggle button for the field you want to include in the form. Then, you can add a custom label for name, email, phone, etc, and from the settings of each field, you can further configure it.

Like, for the email contact field, you can keep it required, hide the label, add a placeholder, and mention domains that you want to allow.
If you want to know in detail what settings are there for each field, you can check this documentation – Collecting user information using contact form
You can even add more fields in the contact form aside from the four built-in fields. Click on “Add New,” and then you can configure by choosing a type for your field whether you want a checkbox, text, number, etc.
Further, you can configure the settings for different fields, some options might be similar but some may have different options. Plus, you can drag and drop the field to change the order of the form fields.
Step 3: Customize Your Contact Form
Once you have added the fields, on the right side of the contact tab, you will see the ‘Form Options’ that allows you to customize your contact form a bit.
Like, you can choose to show the contact form after the quiz – this is only valid if you’re adding the contact form in your surveys or quizzes. Otherwise, you can keep it disabled, so the contact form will appear at the start.
Next, you can opt to show a contact form to logged-in users as well along with the people who are not registered users. Then, you can disable the first page of the quiz and also disable autofill entries.
Once you’re done with all the options, save the form.
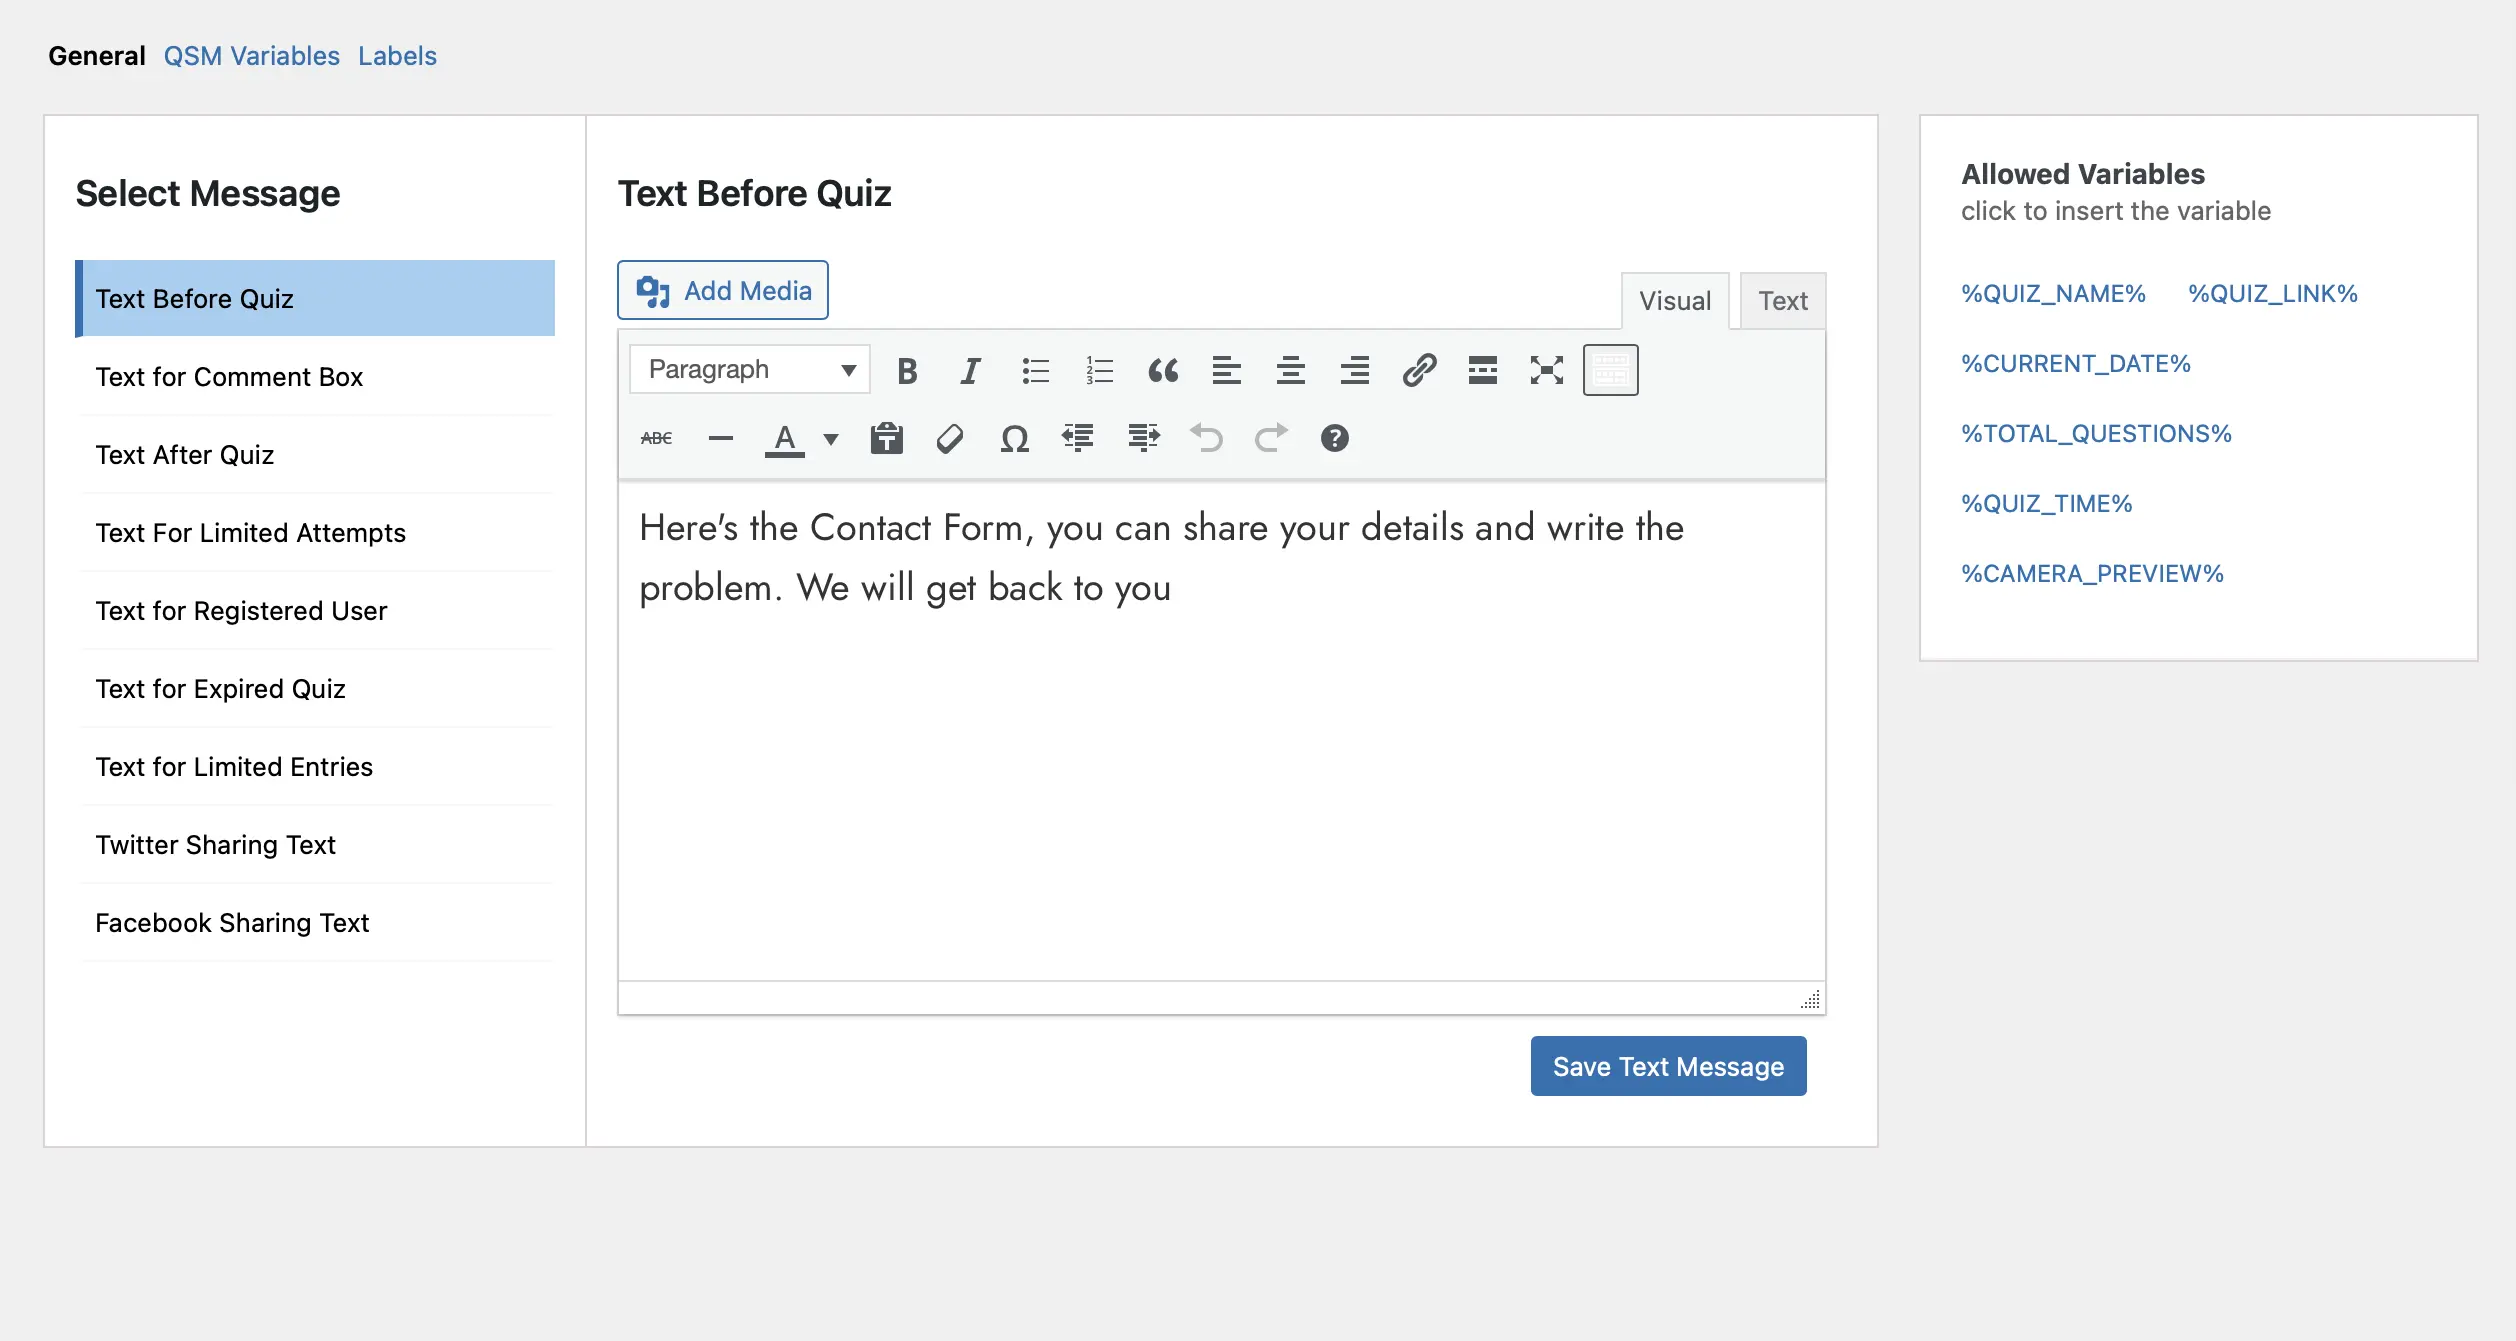
For extra customization, you can provide users with a custom text before filling up the contact form. Go to the Text tab and for the “text before quiz” option you can include a custom message along with allowed variable templates given on the right side. Moreover, you can add a text message for registered users.

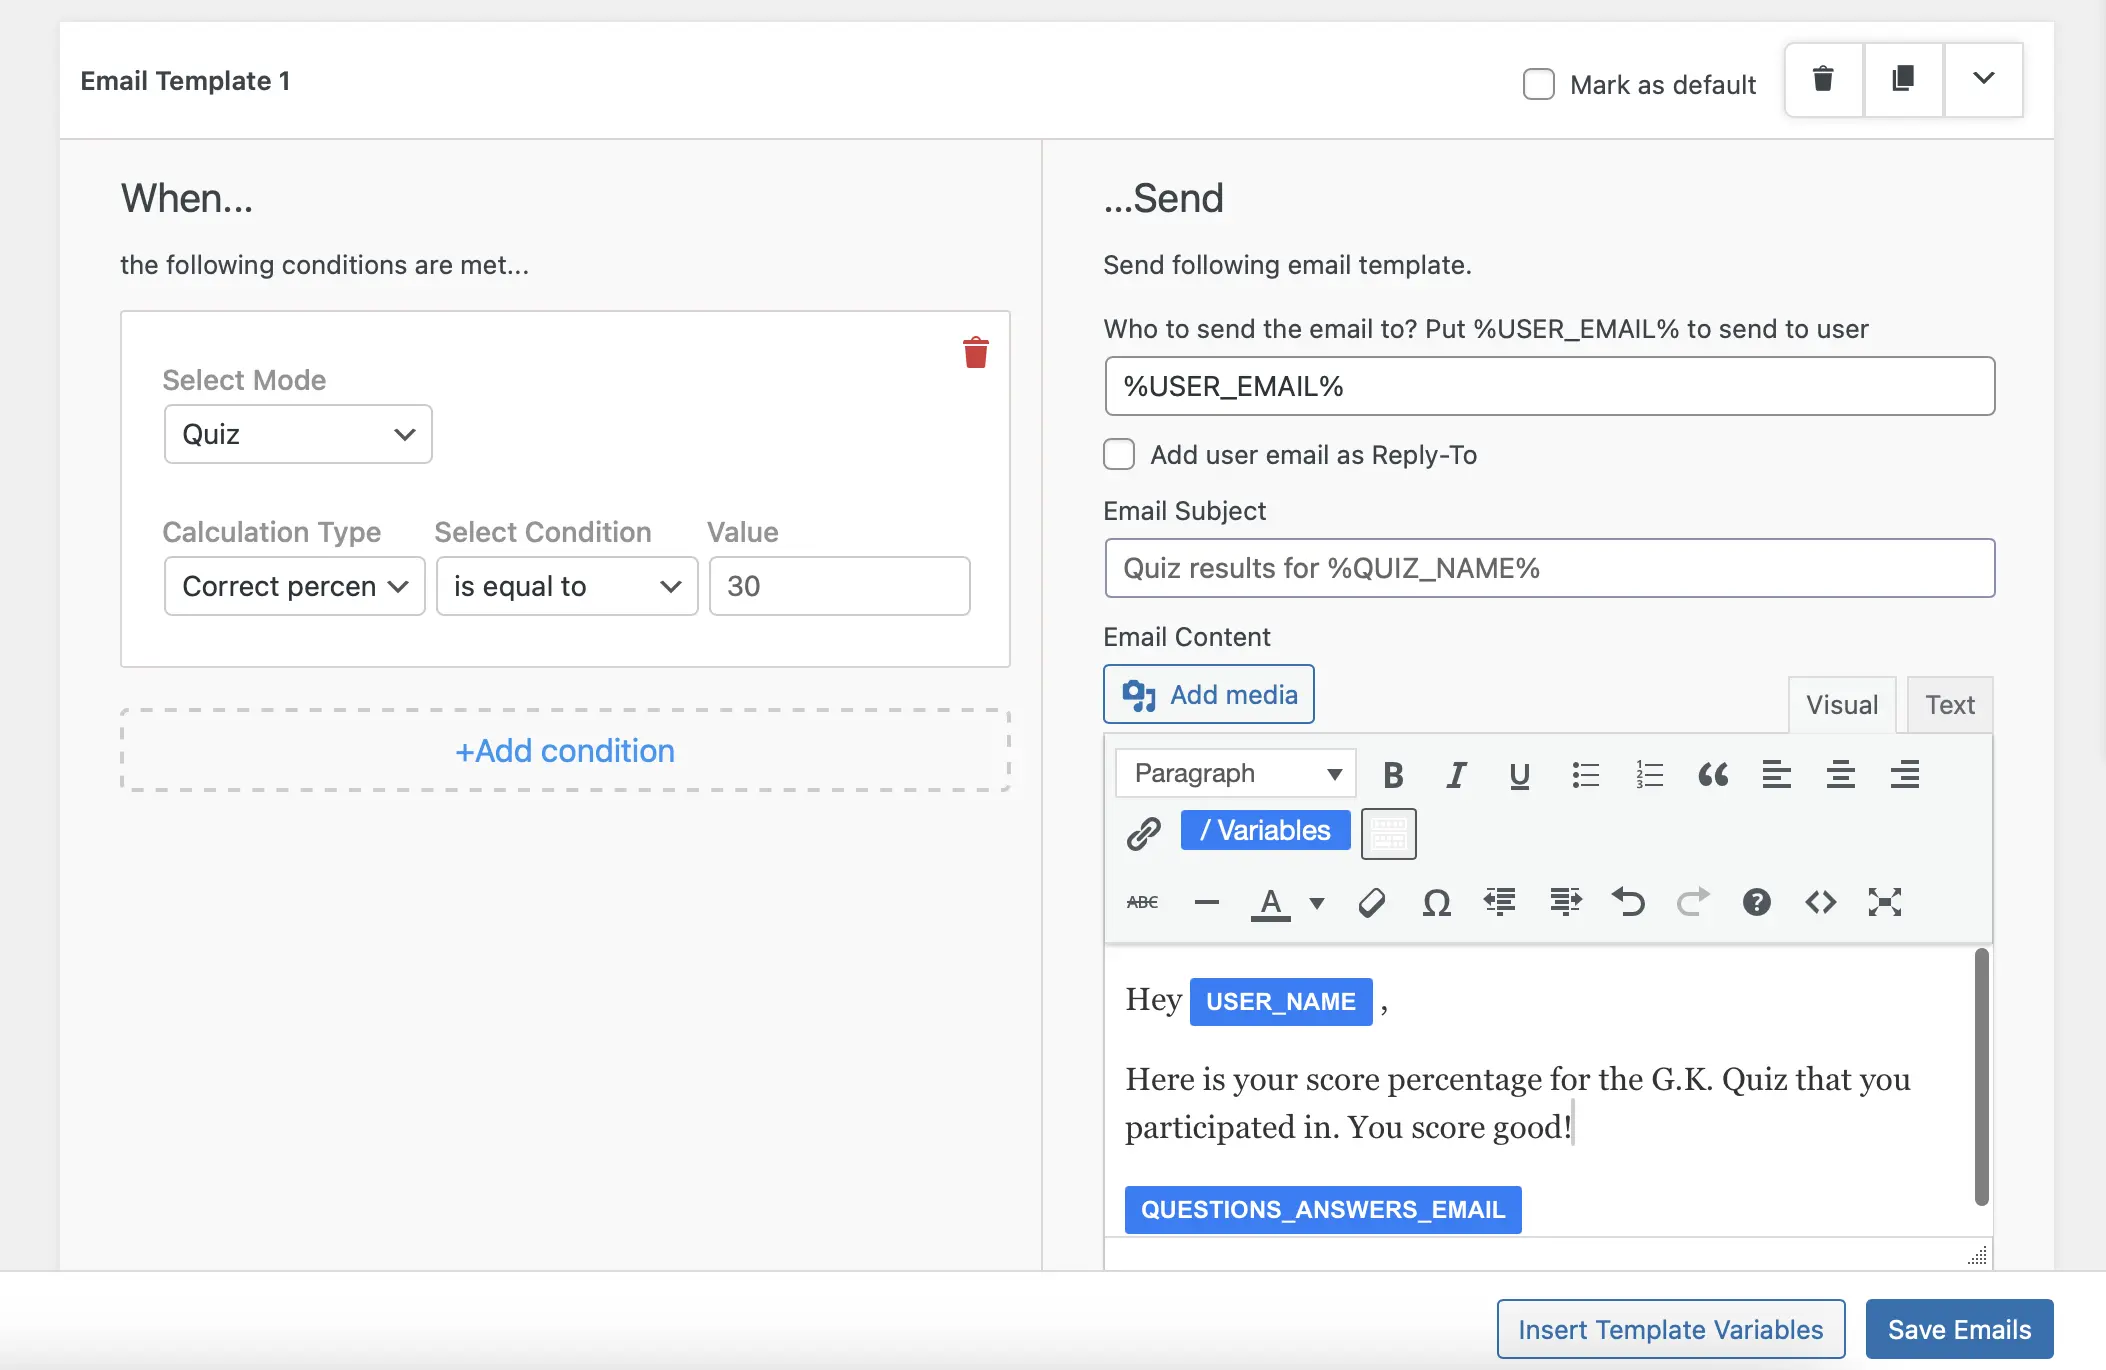
Next, to personalize the communication with the audience especially when they have taken up a quiz, poll, or survey, you can send custom emails. Using the Email template you can create email messages and add conditions for when to share them.

If you want to know in detail how can you set up the Email template in QSM, then check – How to send Emails?
Step 4: Embed your Contact Form on a WordPress Page
You’re now ready to add the contact form in WordPress, for that first, Publish the Quiz. Then, go to the Quizzes/Surveys tab and copy the shortcode of the quiz.

Next, open a new page/post, add a title, and then copy the shortcode using the shortcode block and publish the page. That’s how you’ll be able to see the contact form in WordPress.
Conclusion
A good database of your customers and visitors will help you focus on your work and align your strategies in a way to increase your business. A database can also help you with customers’ insights and make better decisions.
Now that you know about the benefits of collecting users’ information, consider trying to create a contact form in WordPress with QSM. You can create unlimited quizzes and surveys and add contact forms to them to collect information about your audience. It has so many amazing features that will optimize your survey and help you to collect contact information for your customers.