Want to engage your users and block traffic to your site using a poll? You can use the best WordPress poll plugin Quiz and Survey Master to make amazing polls for your users.
Quiz and Survey Master is a WordPress poll plugin that has many various options using which you can optimize your polls. Online polls can help you in creating a customer database and instant feedback using which you can analyze your customers and their needs.
Here we will show you 8 easy breeze steps to create amazing online polls using the best poll plugin for WordPress.
Step 1: Create a New Form
For creating a poll first thing you need to do after installation of Quiz and Survey Master is create a new form. Click on “Add New” to make a new form.
Give your form a name in “Quiz Name”. A poll will be considered as a survey. So select “Survey” in the “ Form Type”.
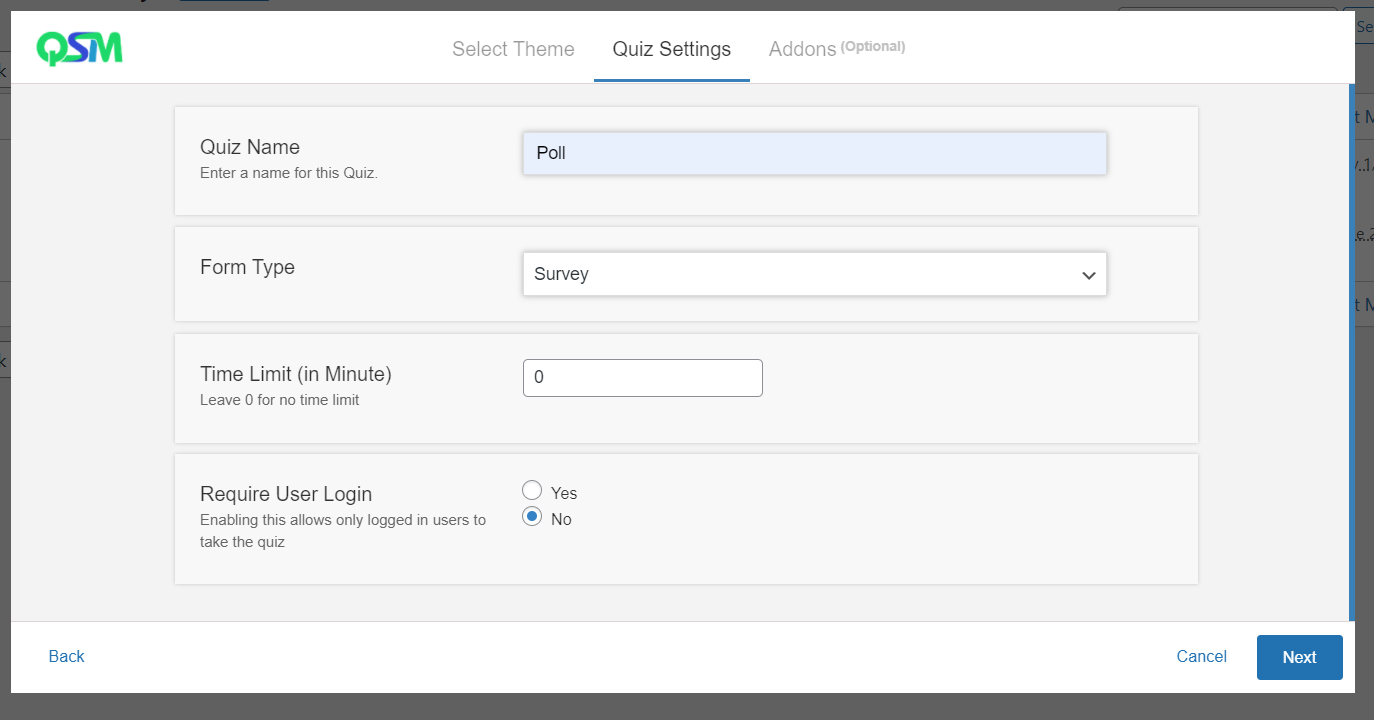
Select a time limit for your survey. There will be a value of “0” by default indicating no time limit. You can change it.
If you want your users to log in before the poll, enable “Yes” in “Require User Login”. After that click on “Next”
Addons are optional. Basic Quiz and Survey Master have many features. It also has over 40+ addons which you might need to level up your poll. You can purchase them and use them as per your needs.
After that select “Create Quiz” to create a new form for your poll.
Step 2: Add Questions
Click on “Question Type” to select the type of question you need for your poll. Quiz and Survey Master have 15 different question types. Choose one that fits your poll requirements.

After selecting the question type, select the answer type by clicking on “Answer Type”. There are 3 options available. Choose any one that meets your requirement.
Now that you have selected question type and answer type, it’s time to add questions and answers to your poll. Click on the question field to add your first question. Click on the answers field to add answers. You can add as many questions as you want.
You can select a category for your question by clicking on “Select Category” on the right side of the interface. Add feature image to the question by clicking on “Feature Image”, if needed.
After editing your first question, click on “Save Question” to save the question. There your first question for the poll will be saved.
Add a new question by clicking on “Create New Question” in the bottom-right corner of the interface. Repeat the same steps and save as many questions as you want using this best WordPress poll plugin.
Related: How to create a personality quiz in WordPress [9 Simple Steps]
Step 3: Create Contact Form
Once you are done with all the questions and their answers, it’s time to create a contact form for the poll using the best WordPress poll plugin. Contact form will help you gather users’ data which you can use in the future to reach out to them, promoting your business, and making leads.
Click on the “Contact” tab and add a new field by clicking on “Add New Field”.
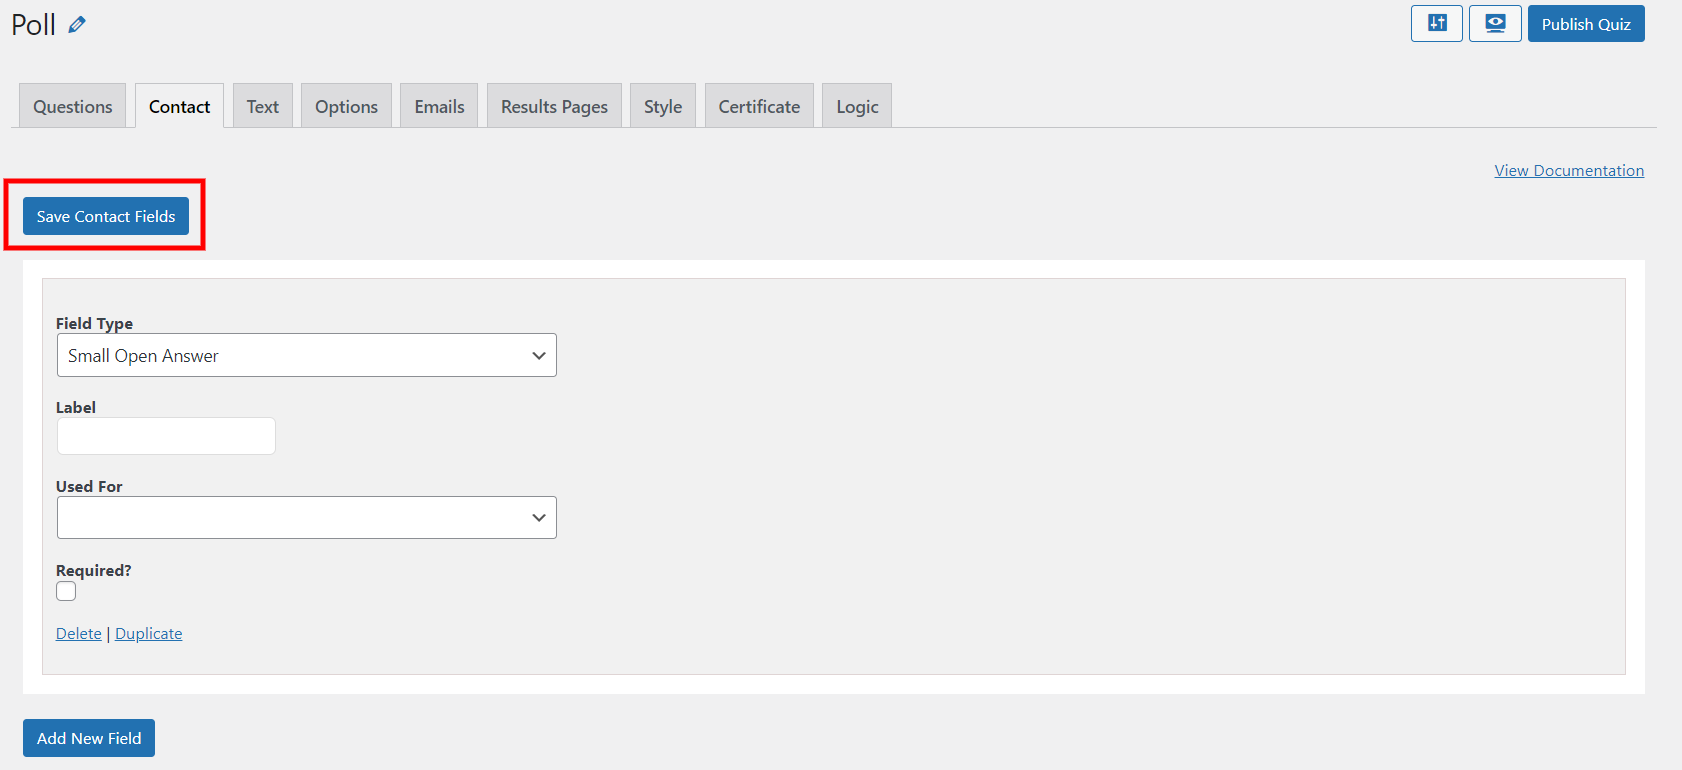
In the “Field Type” there the 3 options. Select one that you need. After that click on “Lable” to label the field. It is a text that appears next to the field.
Then click on “Used for” and select one option out of four that matches your field. Check “Required” if you want your users to force to fill the field.
After doing all these steps, don’t forget to save it by clicking on “Save Contact Fields” in this best WordPress poll plugin.
You can delete or duplicate the field by clicking on the respective button that appears on the bottom left of the interface. If you want to add a new field, click on “Add New Field” and perform the same steps.
Step 4: Edit Text
Quiz and Survey Master is the best WordPress poll plugin that allows you to show text to your users at different times.
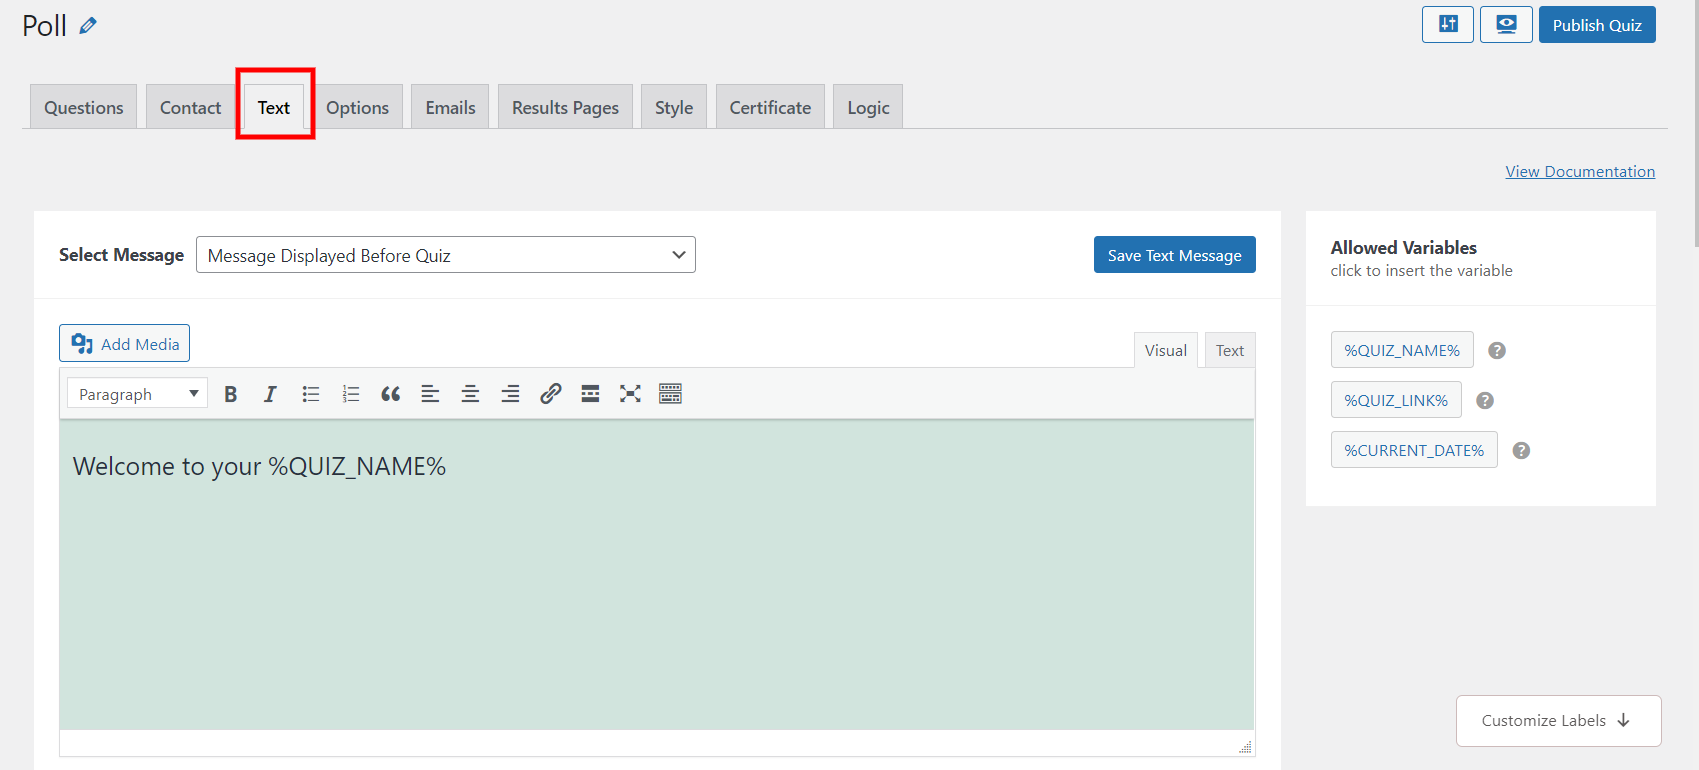
Click on the “Select Message” to select when the text should appear. Edit the text using various variables. You can see some allowed variables on the right side of the interface. Simply click on them to copy and paste in the text field.
There are various options available to customize your labels as well. Click on “Save Text Message” to save it.
Step 5: Customize Options
This best WordPress poll plugin offers you various options to customize and personalize your WordPress poll. With the “Options” tab, you have control over the users’ activity and how you want them to attend the poll.
Few options which we think might help in creating good polls are listed below.
- Progress Bar: You can show the progress bar to your users so that they can know how much survey is completed or left.
- Require User Login: This might help you in collecting users’ information for future opportunities.
- Force submit after time expiry: This will end the poll after the time selected for the poll. The users will then be directly brought to the results pages.
- Limit Attempts: With this option, you can restrict the number of attempts a user can give.
- Limit entries: You can limit the number of users who can take the poll.
- Limit number of questions: Specify the number of questions you want your users to answer.
- Quiz Dates: with this option, the users will only get access to the poll between the dates specified.
- Contact form position: You can select when you want your users to fill the contact form.
- Show contact form to the logged-in users: if you don’t want your existing users to again fill the contact form, disable this field.
- Enable comments: If you want to get feedback from the users, enable this option. Users will be provided with a comment box at the end of the poll.
- Save Responses: Enable this option to get access to your users’ responses for a lifetime.
There are many other options for creating a WordPress poll as well. Read the Options Tab to know more about the options tab.
Save all the changes by clicking on “Save Changes” in the bottom-left of the interface.
Step 6: Edit Emails
After taking a poll you might need to send mail to your users. You can use the “Email” tab for that.
You have control over which mail to send which user and when to send it. Add additional conditions on when to send a specific mail to the user, by clicking on “Add Aditional Conditions”.
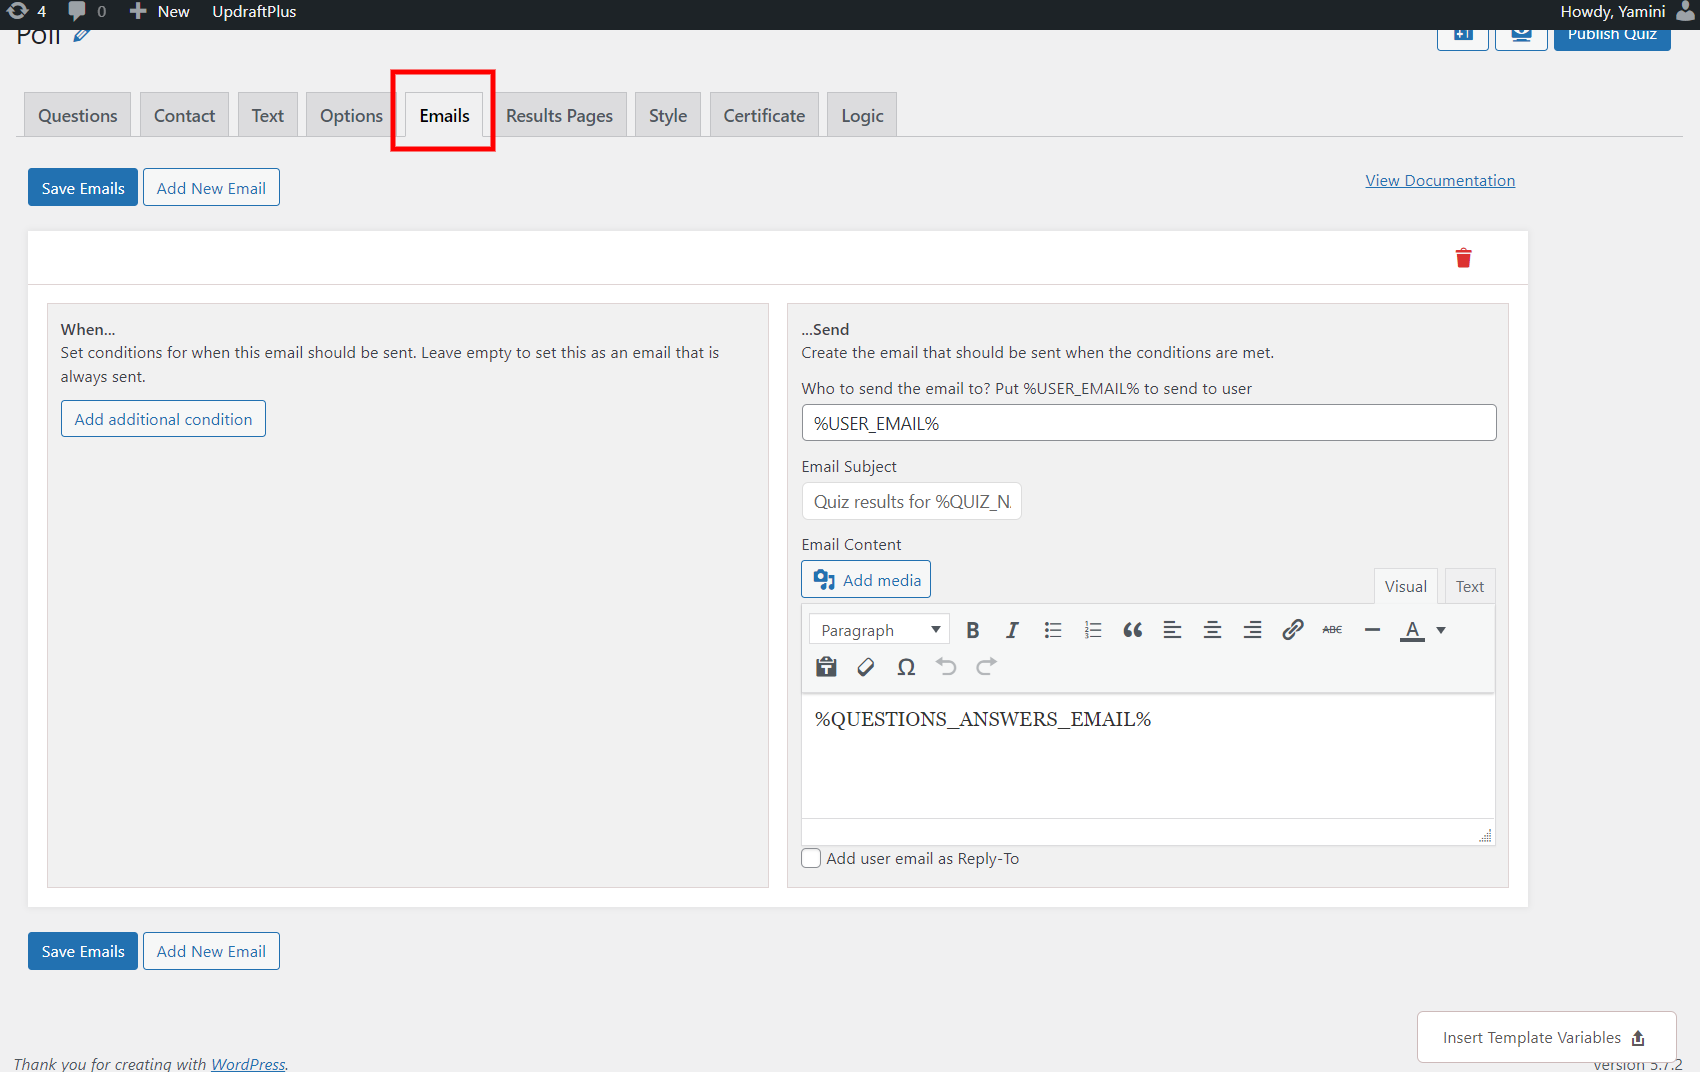
You can edit and personalize the subject and the body of the email. There are various template variables available. Click on that and it will be copied. Paste it in the text and you are good to go.
Save that email by clicking on “Save Emails”. Add another email with different conditions by clicking on “Add New Mail”
Step 7: Create Results Pages
At the end of the poll, you will have to provide your users a result page. Best WordPress poll plugin offers you various options to edit the result pages for your users.
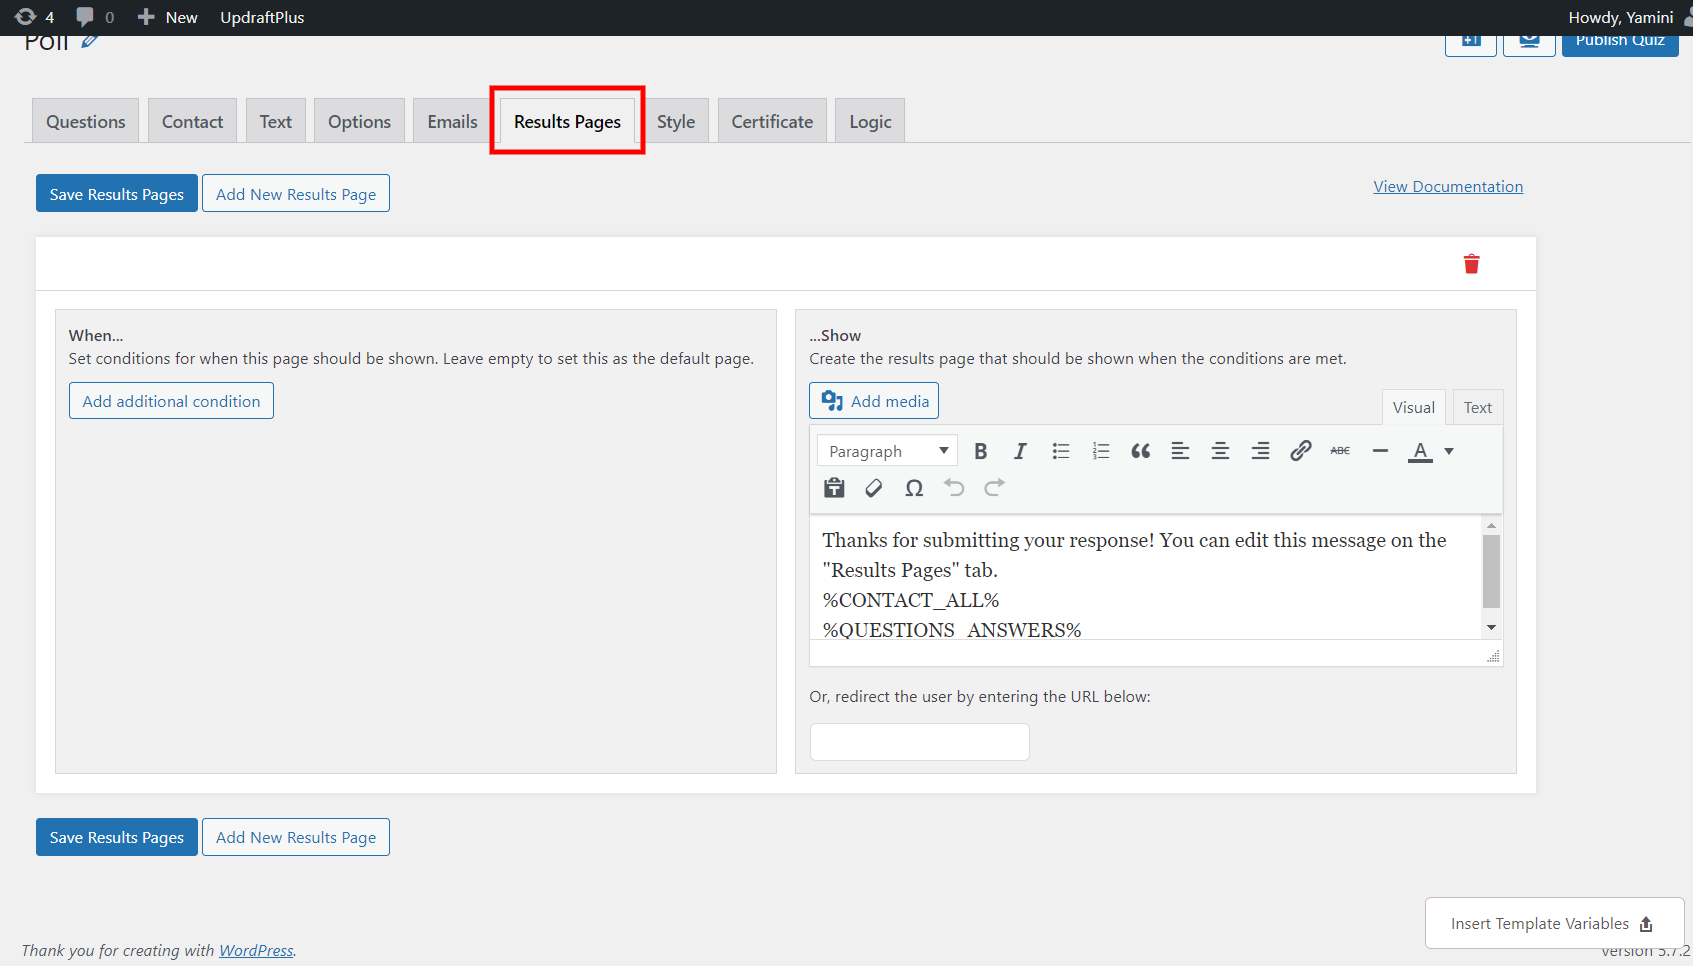
Click on the “Result Pages” tab. Select when a specific result should be shown to a user by clicking on “Add Aditional Conditions”. Customize the text using various options. Insert variables to edit text, by clicking on “Insert Template Variables”.
Step 8: Customize Styles
After completing all the steps it’s time to make your poll look beautiful. Click on the “Styles” tab.
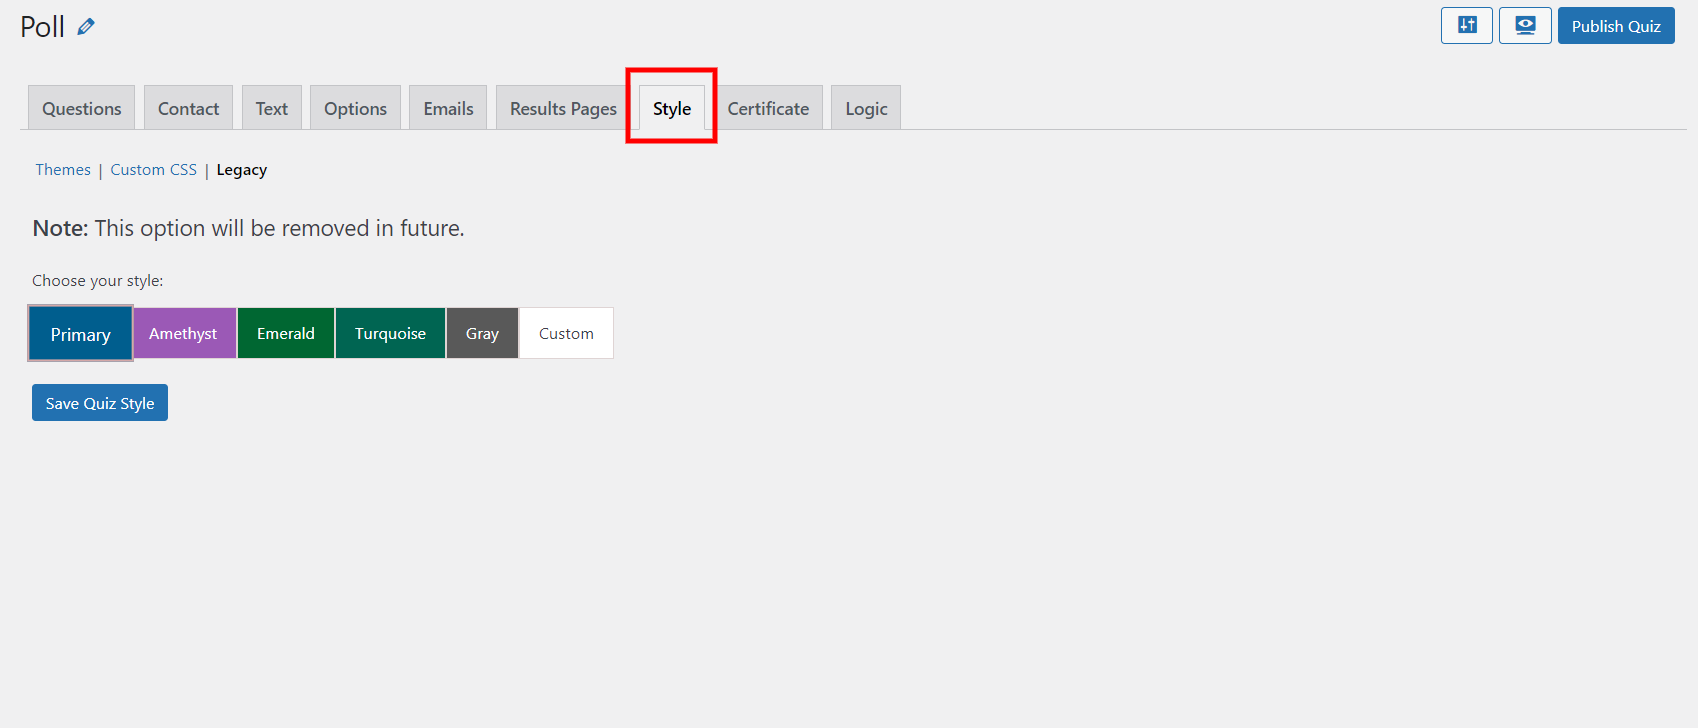
There are some predefined themes from which you can choose to make your poll look good. You can also customize themes using “Custom CSS”.
Best WordPress poll plugin QSM offers you Premium themes which you can use and make your poll look amazing.
Bonus Tip: Offer Free Certificate
Best WordPress poll plugin offers you a free certificate add-on. You can use it and provide your users with the certificate for taking the poll.
There are various options available to customize certificates for individual users.
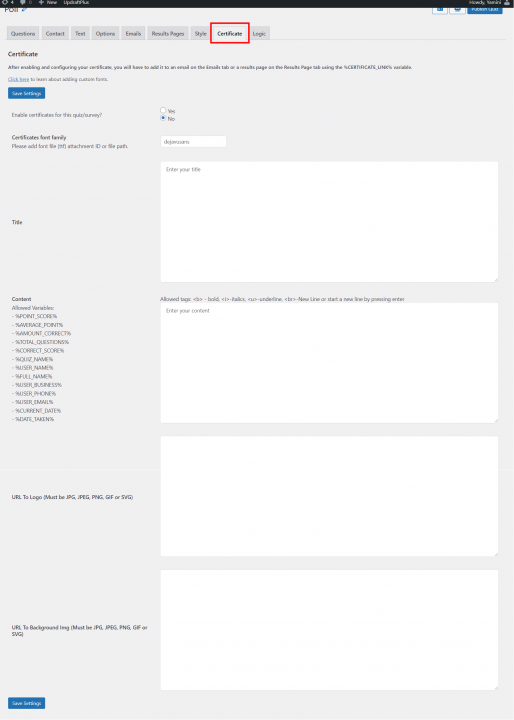
Firstly you will have to enable certificates for the poll. Select a font and add a title to the certificate. To edit the content of your certificate there are different variables available. Using that you can create an amazing certificate.
If you want to keep your logo in the certificate, copy-paste its URL in the “URL to Logo”. The same goes for the background images. Paste URL in “URL to Background Image”.
Save all the settings by clicking on “Save settings” and you are good to go.
Conclusion
We hope that this article has helped in creating WordPress polls. You can create amazing online polls with this best WordPress poll plugin- Quiz and Survey Master.
Polls are an amazing way to keep your users and visitors engaged. You can use the data collected from the poll to improve your marketing strategies.
Now that you know how easy it is to create polls, try to create one. If you need to optimize your polls using various options, try QSM Pro Bundle. It has various amazing features that will help you in making your poll engaging for your users.