Want to engage your users with interesting quizzes and surveys? You have landed on the right page!!!
Quiz and Survey Master – WordPress quiz plugin is the most popular quiz plugin for WordPress. It offers you to create different types of quizzes and surveys which you can customize and personalize for your users.
With QSM you can also offer free certificates to your users which can be downloaded by them. Quiz and Survey Master has a free “Certificate” addon for that as well. Read till the end to get more details.
You may want to create an online exam where respondents who pass the test get a certificate, or a simple quiz that boosts their knowledge. Use the QSM plugin as you like and get the most out of it.
In this article, I have provided a step-wise guide on creating Quizzes and Surveys using the Quiz and Survey Master – WordPress quiz plugin along with steps to offer free certificates to your users.
Step 1: Create a Quiz
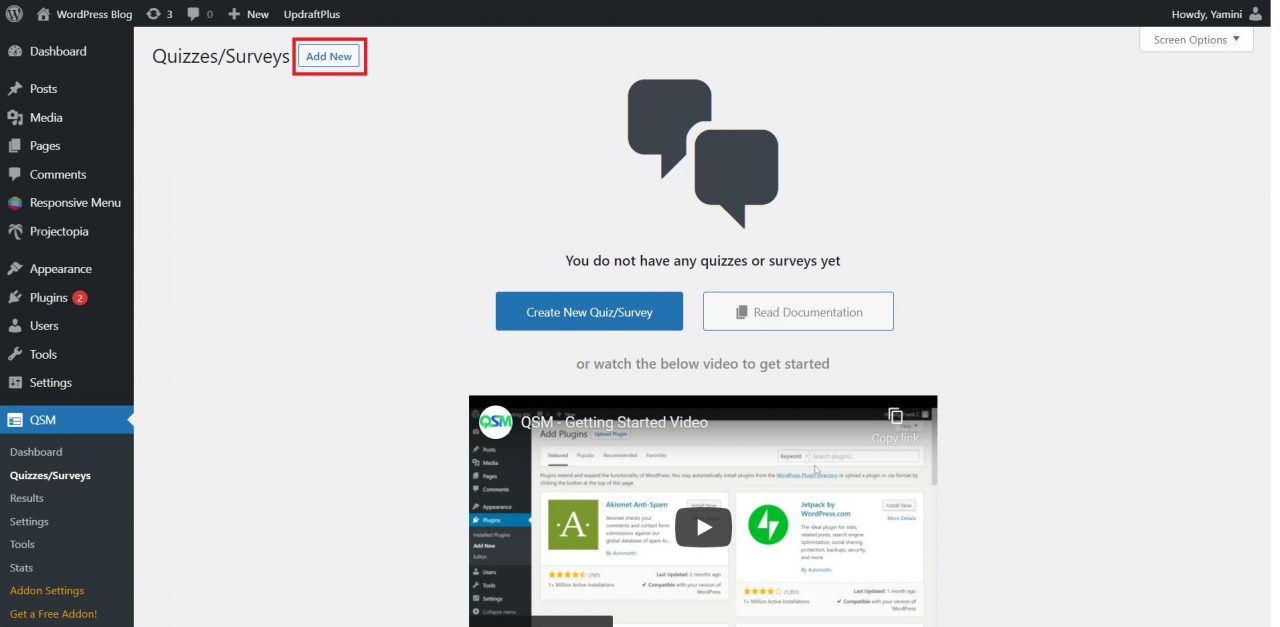
Install the Quiz and Survey Master Plugin and create a new quiz.
You can select a theme as per your need and give a name to your form. There are 3 different types of forms for namely quiz, survey, and simple form. After selecting the type of form, you will have to select the grading pattern.
There are 3 types of grading systems WordPress quiz test,
- Correct/Incorrect: It works in a work to show percentage based on your user’s overall score.
- Points: It allows you to give points to every question, which will sum up at the end of the quiz and you will get total points
- Both: It allows you to enable correct/incorrect and points options and make results based on that.
Out of the three grading pattern offered by WordPress quiz plugin, you may choose one.
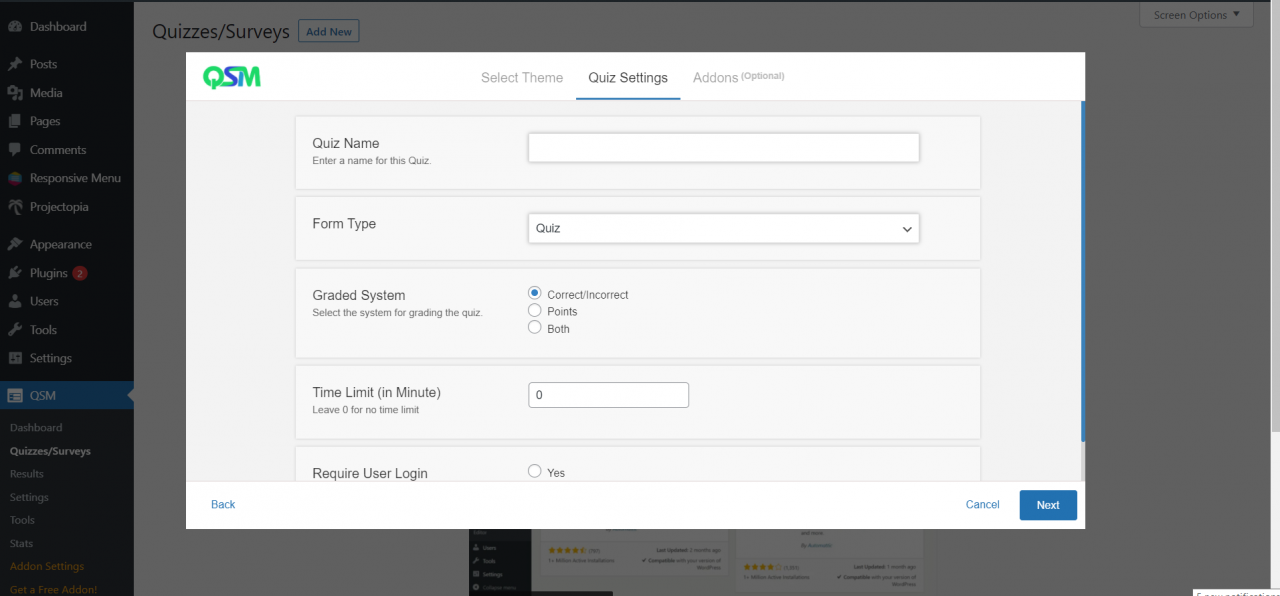
Next, you have to select “Time Limit” for your quiz. You can leave 0 for no time limit. Then select yes if you want your user to log in to your site before the quiz/survey.
Quiz and Survey Master also has many “Pro Addons” based on the requirement of users’ needs. Select an addon that fits your need and download it.
For the detailed instruction on addons, you must read How to install addons.
Step 2: Add Questions and Answers
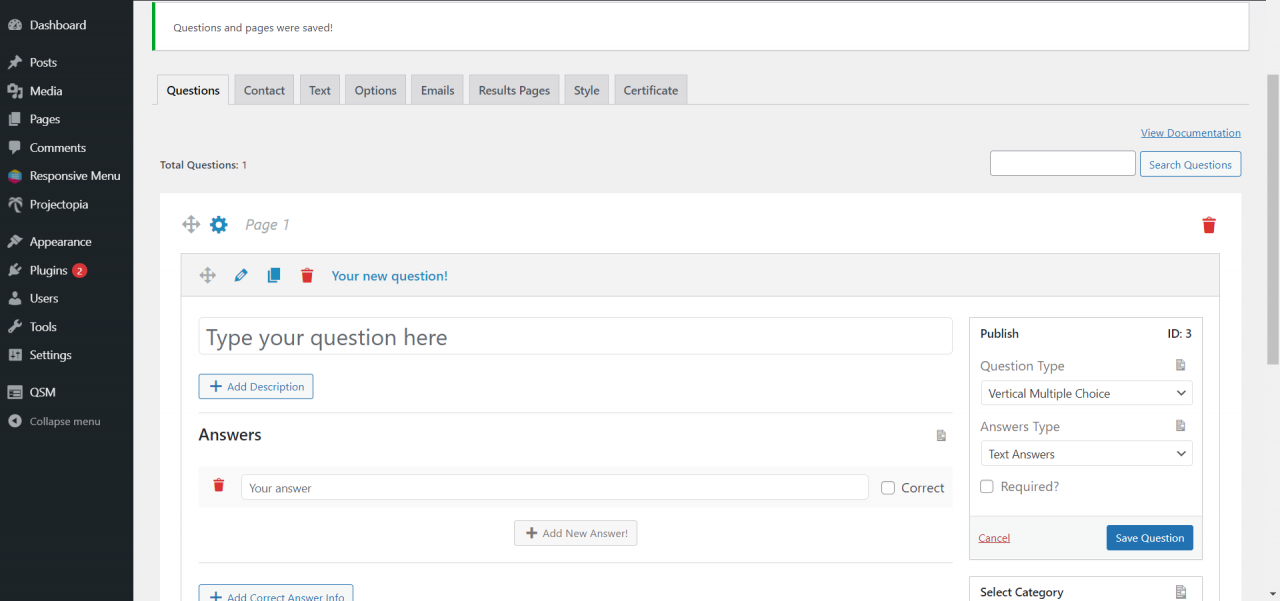
After completing the above steps, you will land on the Questions Tab of Quiz and Survey Master where you can start adding questions.
Write your first question to the question field and add a description if needed. This WordPress quiz plugin comes with various question types(15 Question Types to be precise) to help you land a quiz/survey in just the right way. You can choose any type as per your requirements and can start building your form.
For detailed question types, read the Question Types (Overview).
Answers are the options selected by your user. For creating a system for answers, you will find settings below the question field.
Type your answer and add points or check “Correct” according to your grading pattern. You can add multiple options and can even check multiple answers as correct. Add correct answer description if needed.
Related: How to create a personality quiz in WordPress [9 Simple Steps]
You can even categorize your option and add a featured image to make it look better.
After all these things, save your question. Start making another question with the same process.
Step 3: Customize your quiz with various options
There are various options available to customize your WordPress online quiz test.
1. Create a Contact Field
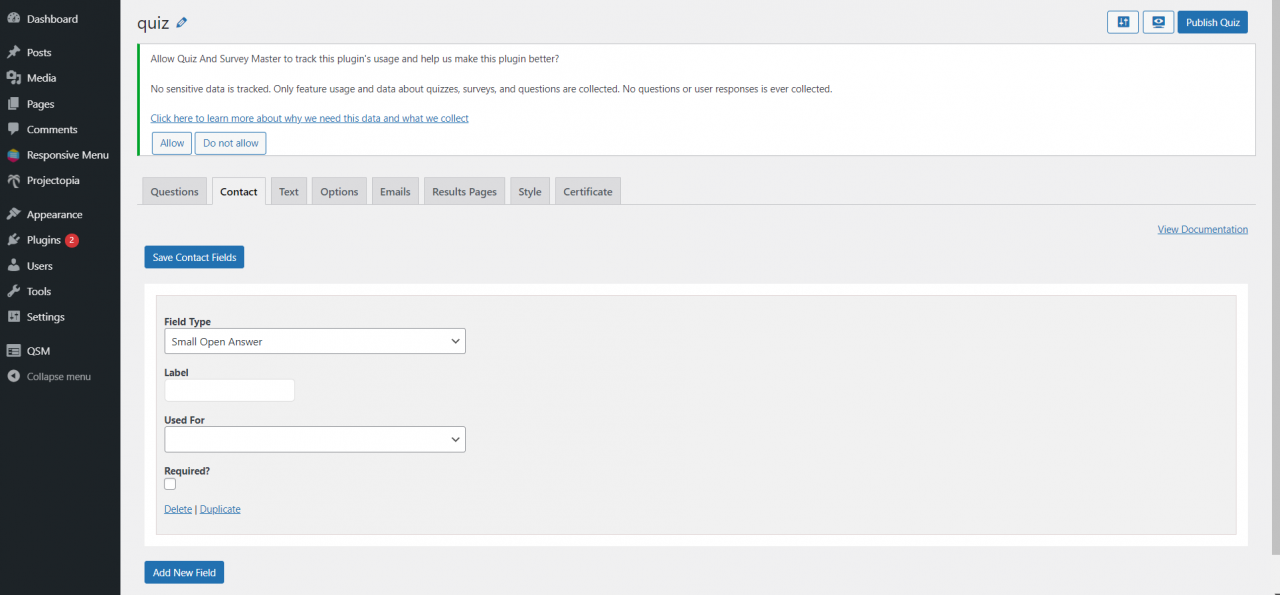
With this option, you can collect your user’s data before or after the quiz.
First, you will have to select the “Field Type”. You can select from a small open answer, email, or checkbox.
A “Small Open Answer” is a text box for collecting information like name or address. Email is to ensure that the entered information is the correct email address. And finally, a checkbox is used to make users agree on terms and conditions.
Click on the “Label” to label the field by providing text which will appear above the field.
The next option is “Used For”. This will again help you collect user’s information like email address, business, and phone number.
Check the “Required” option to force users to give their details before the quiz/survey created using this WordPress quiz plugin.
You can “Delete” or “Duplicate” the fields by clicking on the respective options. Click on “Add New Field” to generate a new field from the scratch.
After adding all the fields don’t forget to click on “Save Contact Field” to save all the fields.
2. Add Welcome Text and Customize Labels
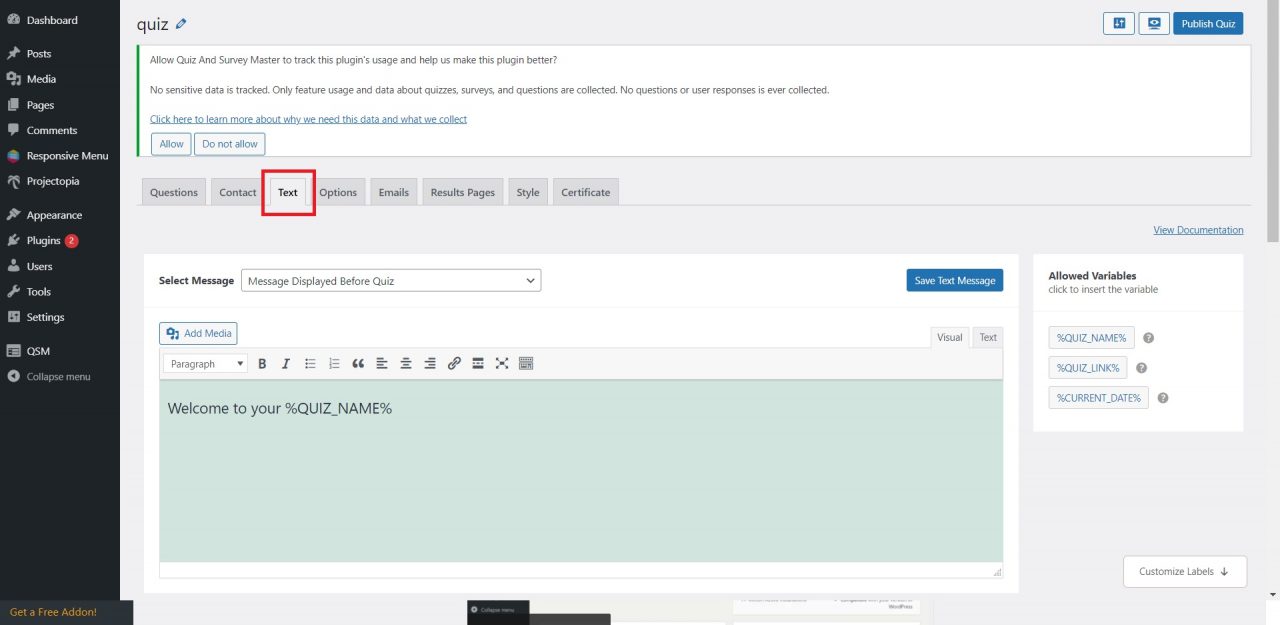
To edit text, you will first have to click on the text bar. WordPress quiz plugin QSM has a drop-down list of various user display messages. Every option has a different purpose and you can select one that fits your needs.
“Customize labels” offers you to change the default text that appears on the Quiz Navigation Button, validation messages, and some other options.
3. Configure Quiz Working
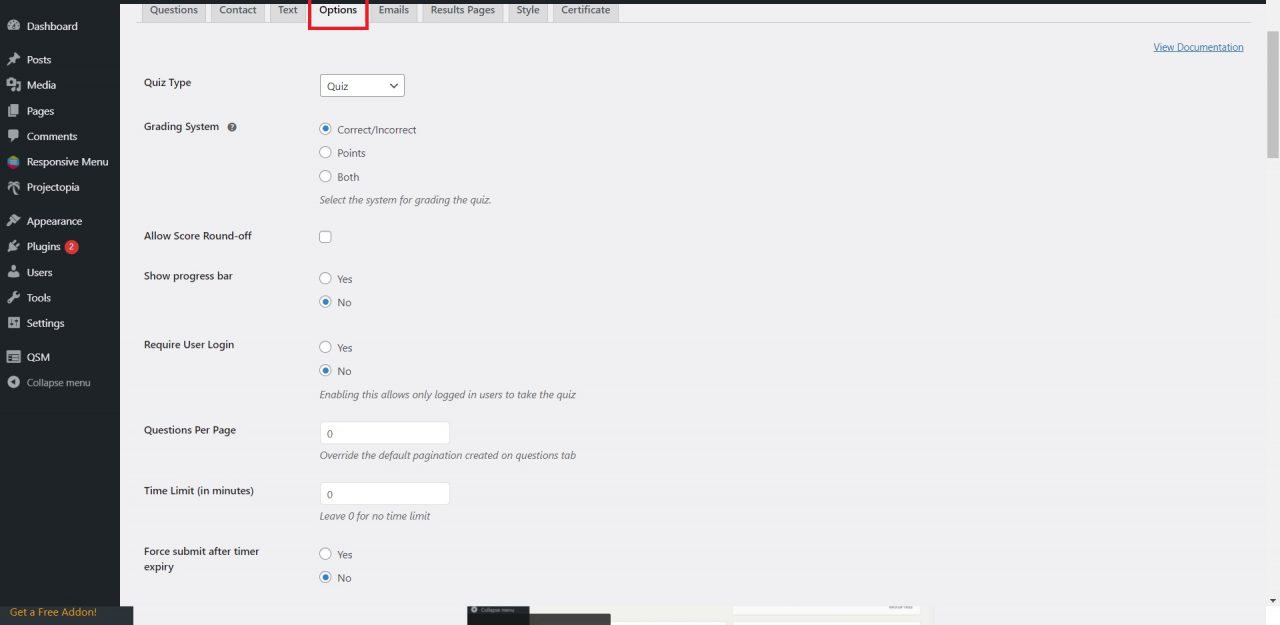
This WordPress quiz plugin allows you to edit options in detail. Under the ‘Options’ tab, you get access to various field for edit.
You can control your user’s activity and how you want your users to take the quiz using this option.
For detail breakdown of the Options tab, read the Options Tab.
4. Configure Emails
After your users take the quiz, you might need to send them a mail regarding their score or the results or to just let them know that they have submitted the quiz.
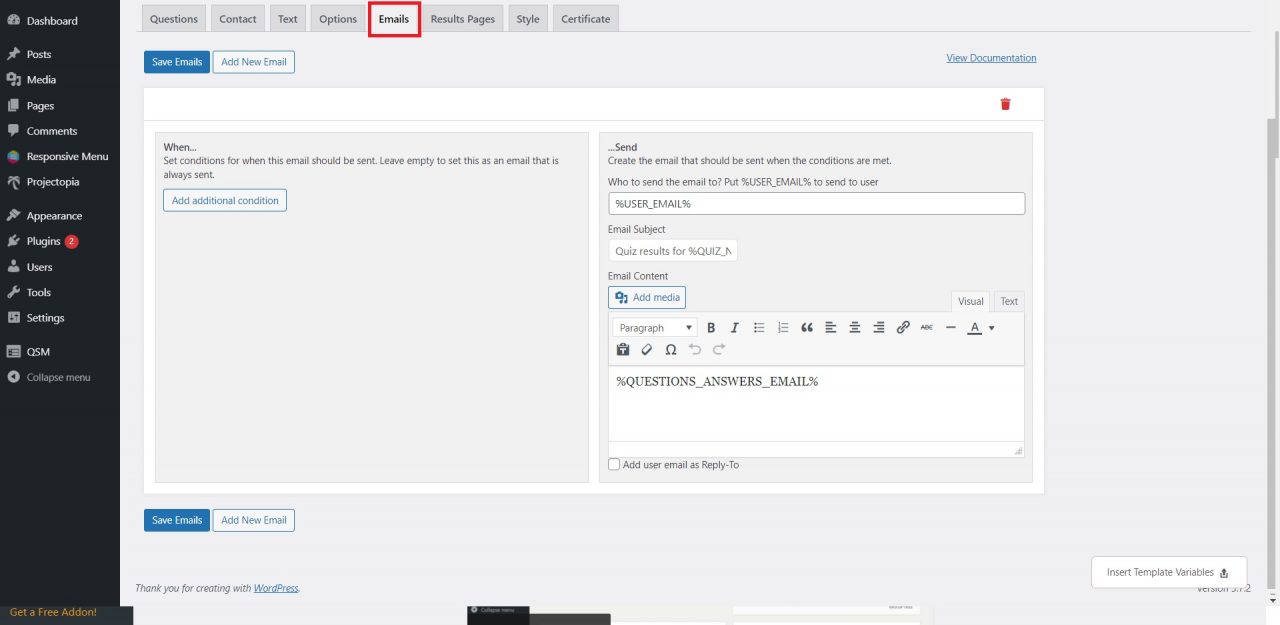
QSM WordPress quiz plugin gives you access to edit an email using various “Template Variables”. Simply copy the variables from the “Insert Template Variable” option in the bottom-right corner. Customize your email subject and content as per your preferences.
You can even “Add Additional Conditions” to add additional conditions on when the email should be sent. After doing all these save the email.
To create a new email, click on “Add New Mail” and repeat the same steps.
5. Set up Results Page
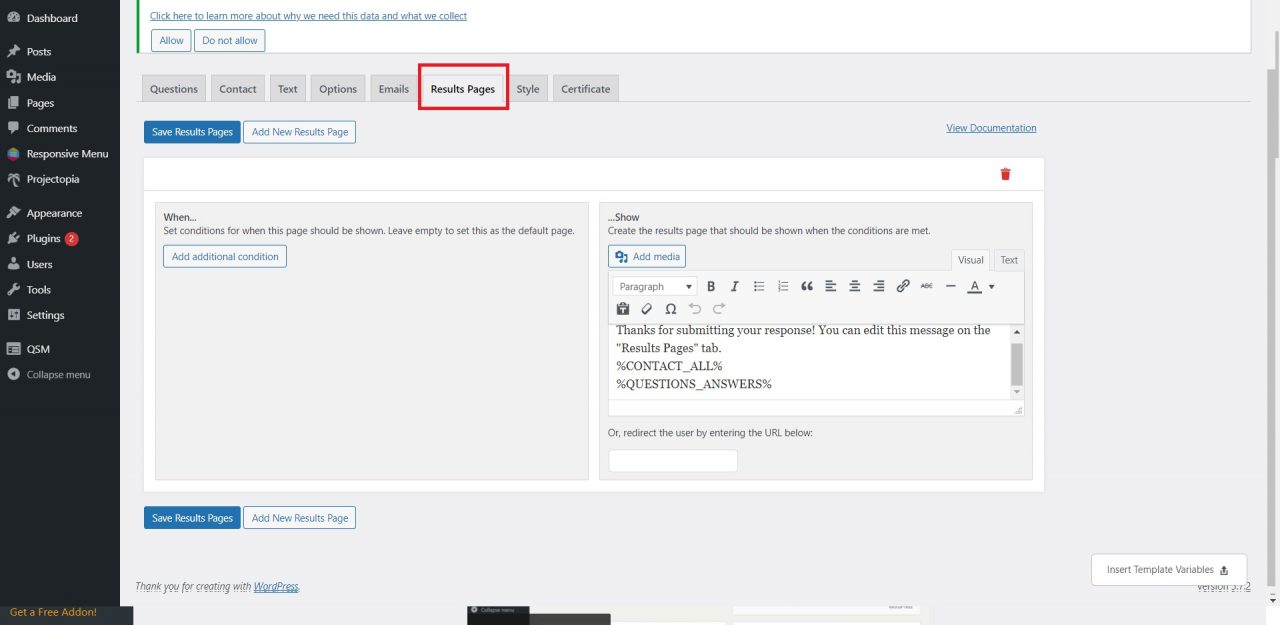
With WordPress quiz plugin, you can create a result page for your users.
On the “Result Page” tab, you can “Insert Template Variables” to personalize your result page. By default, there are only two variables present, but you can add content like users’ names, their score, total score, email, and so on, using template variables.
If you feel like showing different result pages according to the user’s score, click on “Add New Result Page”. You will again find various options, customize it and save it by clicking on ‘Save Result Pages’.
6. Styles
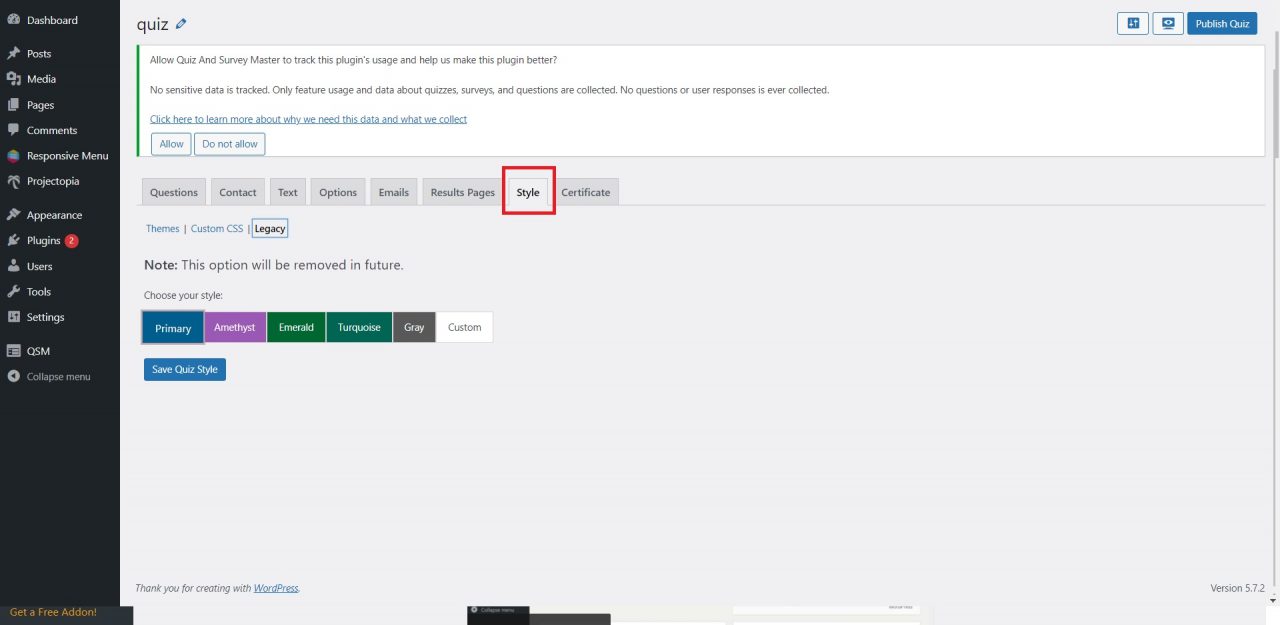
Now to make your quiz/survey look good, you will have to select a theme for it. With Quiz and Survey Master v7.2.0 Premium Themes have been released.
You can now purchase QSM Premium Themes and make your Quiz look beautiful without adding CSS with just a click.
Also the option to add Custom Style CSS is still intact so you can add custom CSS styles on your own if needed.
Step 4: Preview and Publish
Now when you are done with adding questions and customizing your quiz, it’s time for a preview.
On the top-right corner of the interface, you will find an icon for preview. Click on that and verify all the things in your quiz/survey are according to your preferences. If not, you can go back and customize the option you feel need changes.
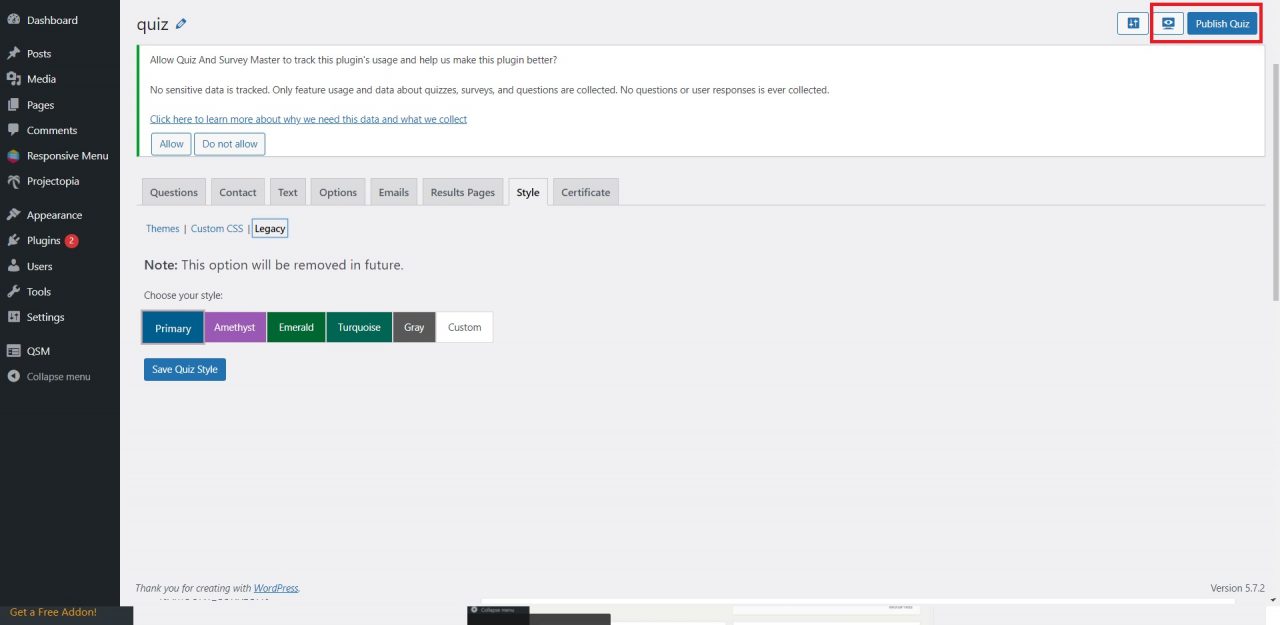
After all the proofreading, once you are satisfied with the quiz you can publish it by clicking the ‘Publish’ button on the top-right corner.
Create Free Certificate
Want to create a WordPress quiz with the certificate?
In the QSM – WordPress quiz plugin, the free “Certificate” addon allows you to provide a certificate to your users after taking the quiz. You can customize it with the user’s name, logo, message, or anything you want.
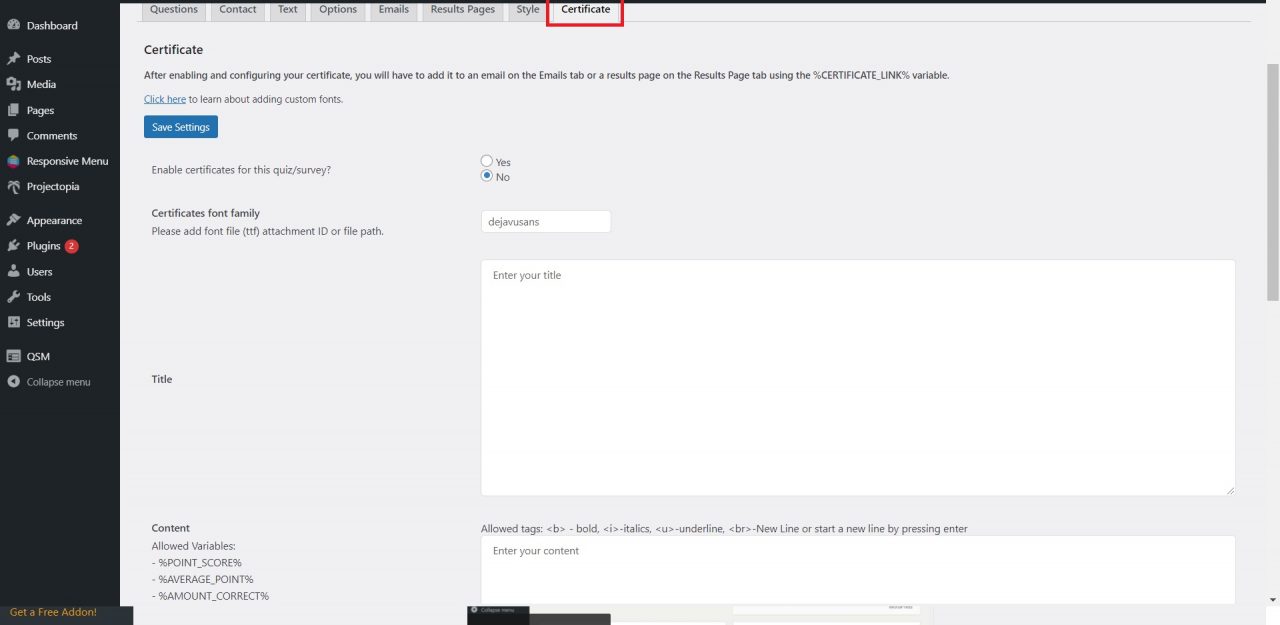
To get started with the certificate addon, you need to install it. In WordPress quiz plugin Quiz and Survey Master, click on addon setting. After that click on the “Certificate” tab and enable it for creating certificates after your quiz”
Choose font family and give an appropriate title to the certificate.
To create the text of your certificate you will have to click on ‘Certificate content’. You can use any template variable to customize your certificate.
Related: How to create a form in WordPress and link with PayPal or Stripe?
Certificate addon also allows you to add a logo. You have to paste the URL of a logo to the respective field. You can also add a background picture pasting URL of the picture to the respective field.
After you are done, don’t forget to save settings by clicking on ‘Save Settings’.
Once you have your certificate setup ready, add the certificate variable to the results page, so that your users can download the certificate.
For more information on certificate addon, read Certificate.
Conclusion
Quiz and Survey Master is a great WordPress quizzes plugin, that helps you make amazing quizzes and surveys without the knowledge of coding.
Don’t forget to buy Quiz and Survey Master Pro to create some great content, generate leads and engage with your users. With the Pro version of the plugin, you can take your quizzes and surveys to the next level.